
Software
PureRef
Blender 3.4/3.5
Substance Painter
Substance Designer
EmberGen
Illustrator
Photoshop
Blender 3.4/3.5
Substance Painter
Substance Designer
EmberGen
Illustrator
Photoshop
Contributor
Concept
The Artist
Folder Structure
Controller
Addons / Plugins
Quick Favourites Menu
Concept
The Artist
Folder Structure
Controller
Addons / Plugins
Quick Favourites Menu
Blocking
Sculpting
Vertex Groups
Basic UVs
Sculpting
Vertex Groups
Basic UVs
Gather Reference
Adobe Substance 3D Assets
SBS or SBSAR
UV Random Color
Skin Textures
Alphas
Bit Depth
Export Preset
Adobe Substance 3D Assets
SBS or SBSAR
UV Random Color
Skin Textures
Alphas
Bit Depth
Export Preset
ShotDeck
Lighting
False Color
Light Groups
Render Passes
File Output
Render Settings
Post Production
Lighting
False Color
Light Groups
Render Passes
File Output
Render Settings
Post Production
This is not a step-by-step tutorial, it’s a general workflow guide on how this project was made.
Preparations
1.1 Contributor
My first personal project with a great sponsor
For this project, Marine Kim, Chief Editor of Substance 3D Magazine, contacted me for a commission to create a 3D scene of my liking. Using any program of the Substance Family, obviously for me, was a joy because I love to texture with Substance Painter, and Im learning a little bit about Designer to increase my repertoire of tools.

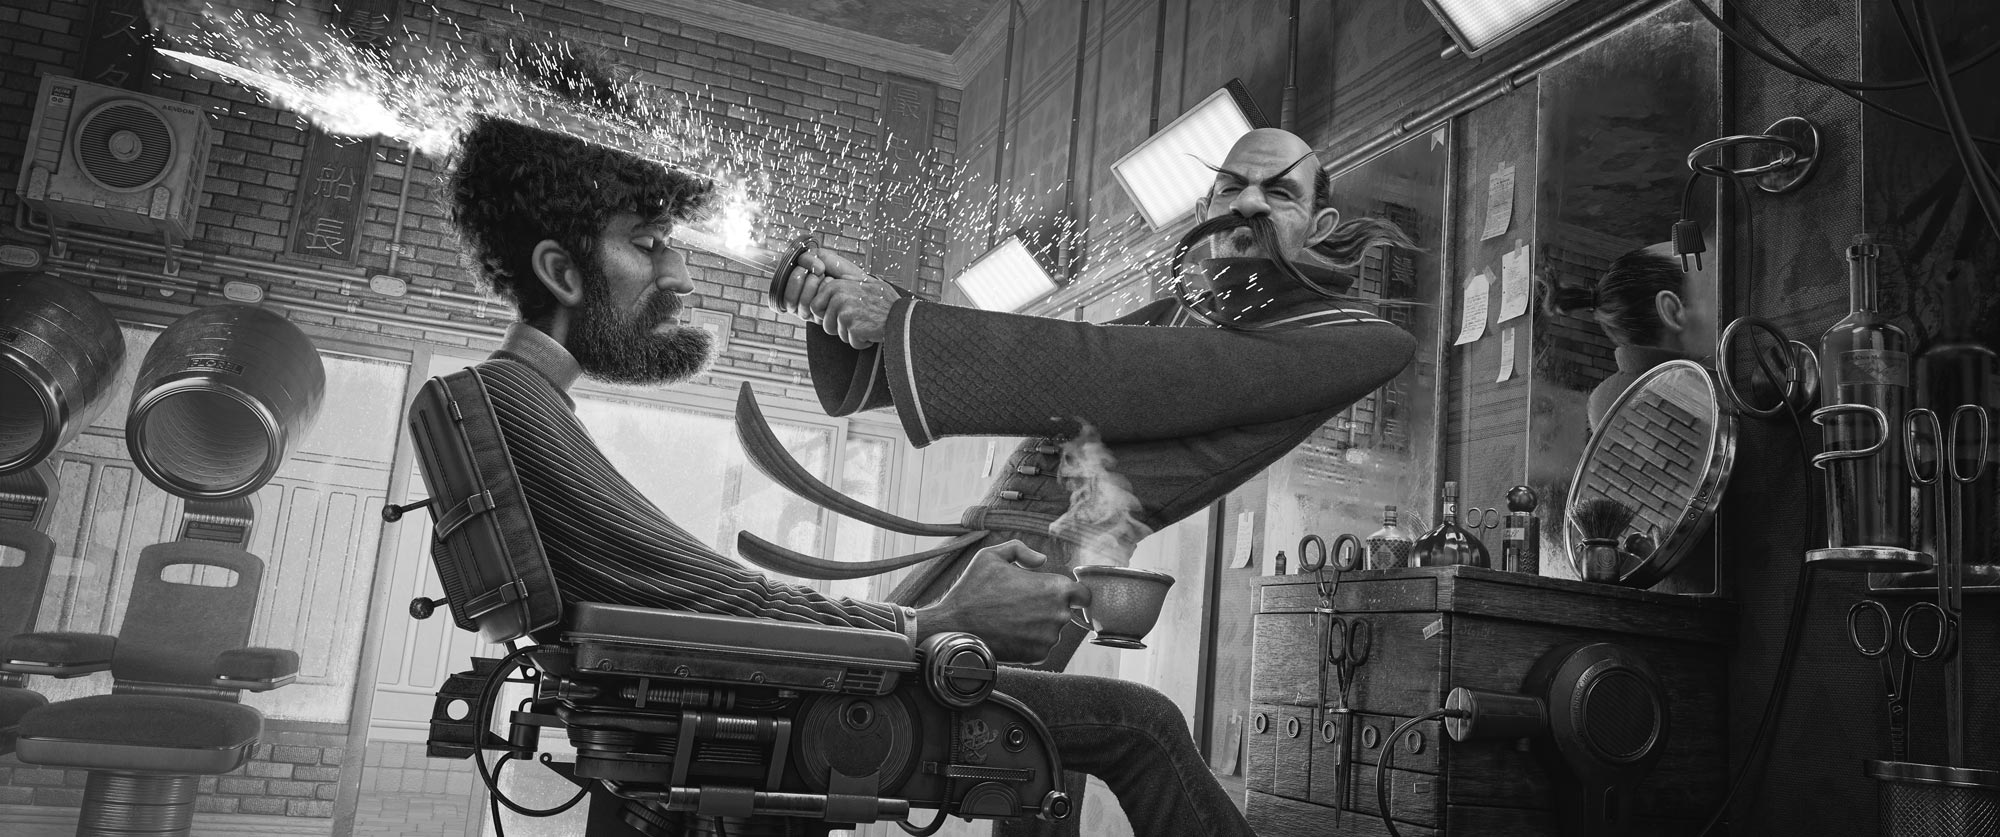
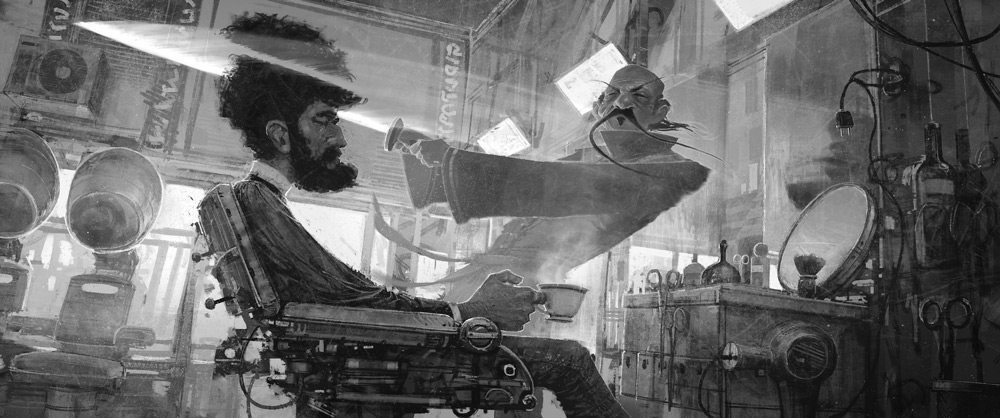
1.2 Concept
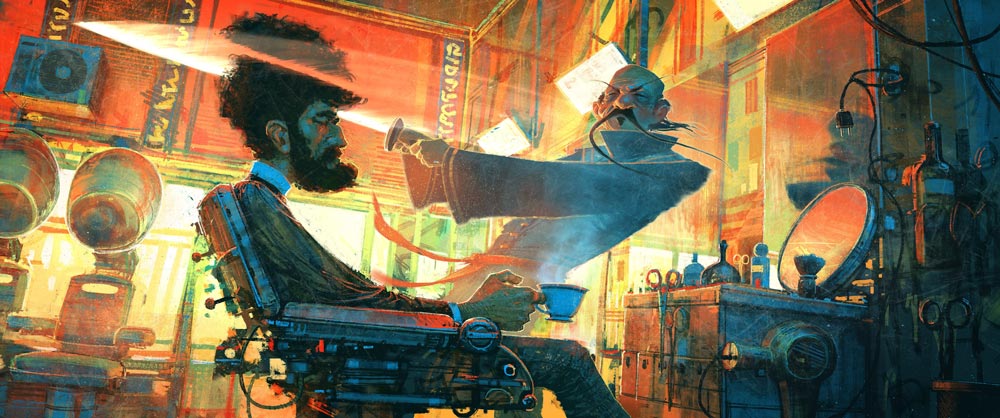
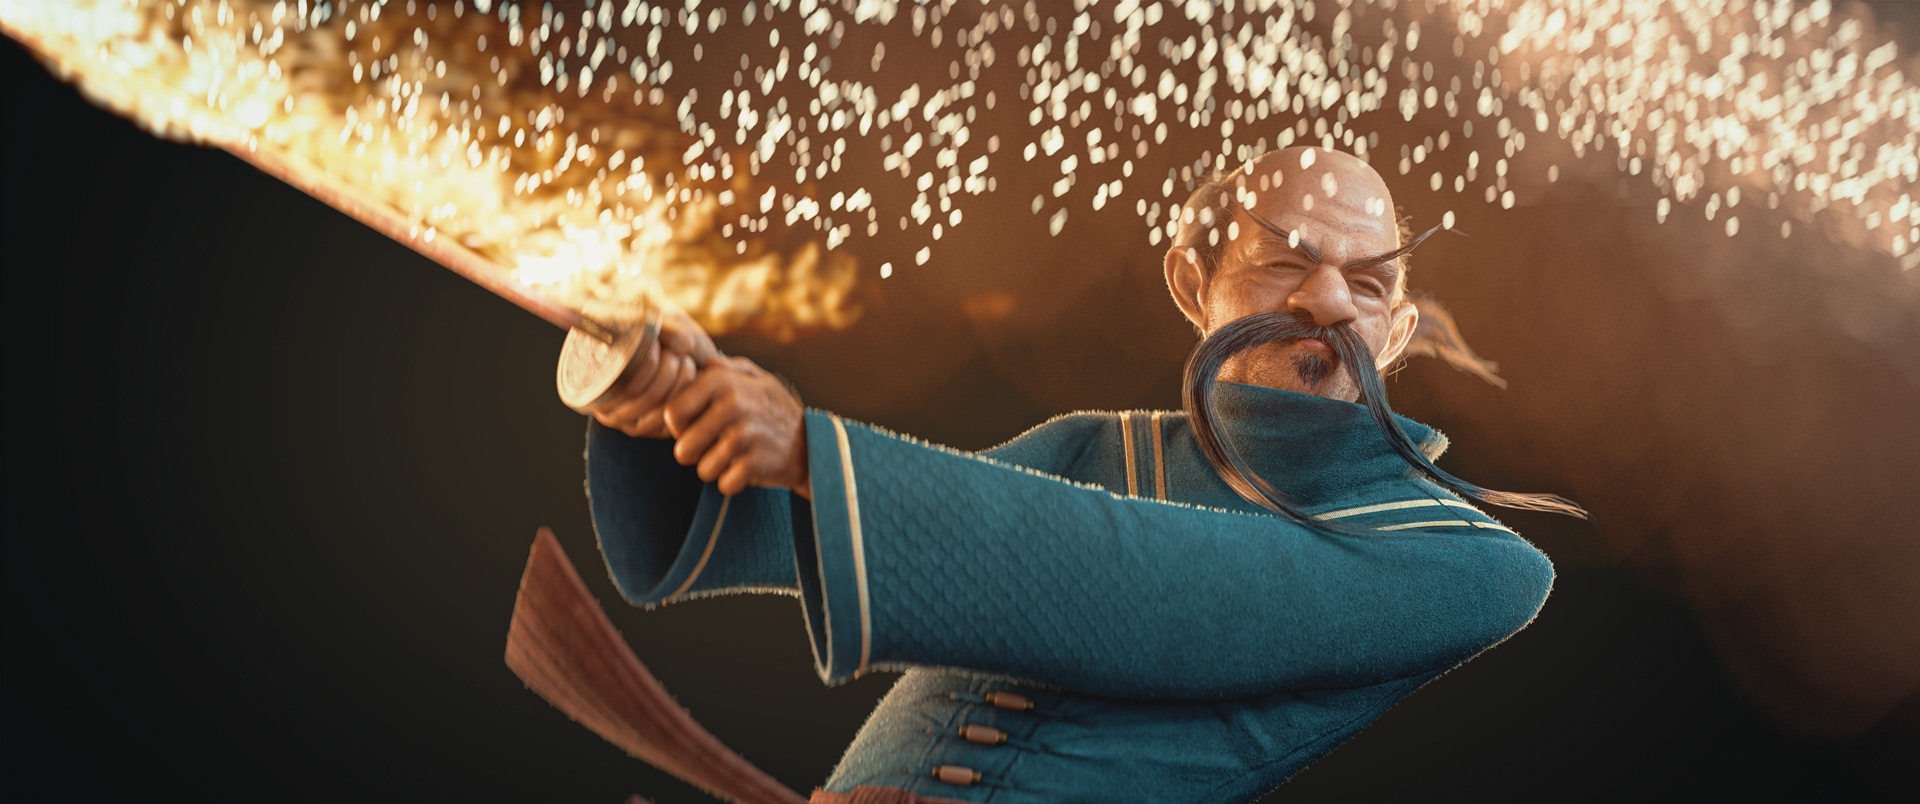
Searching for a great concept
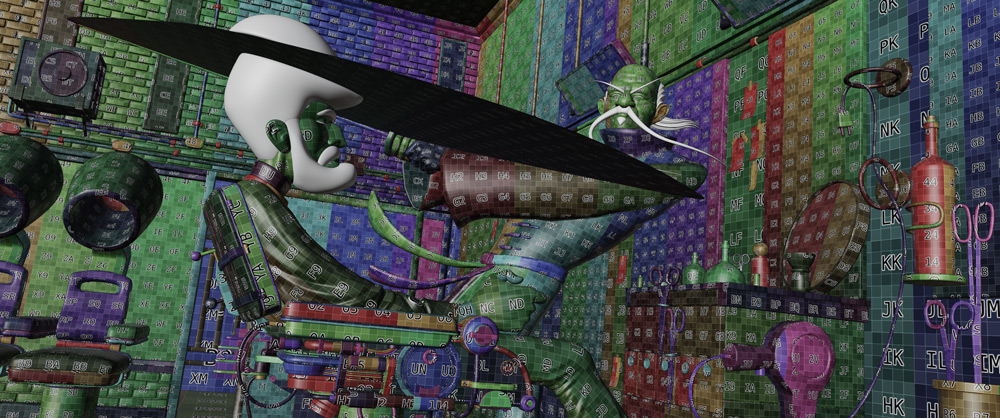
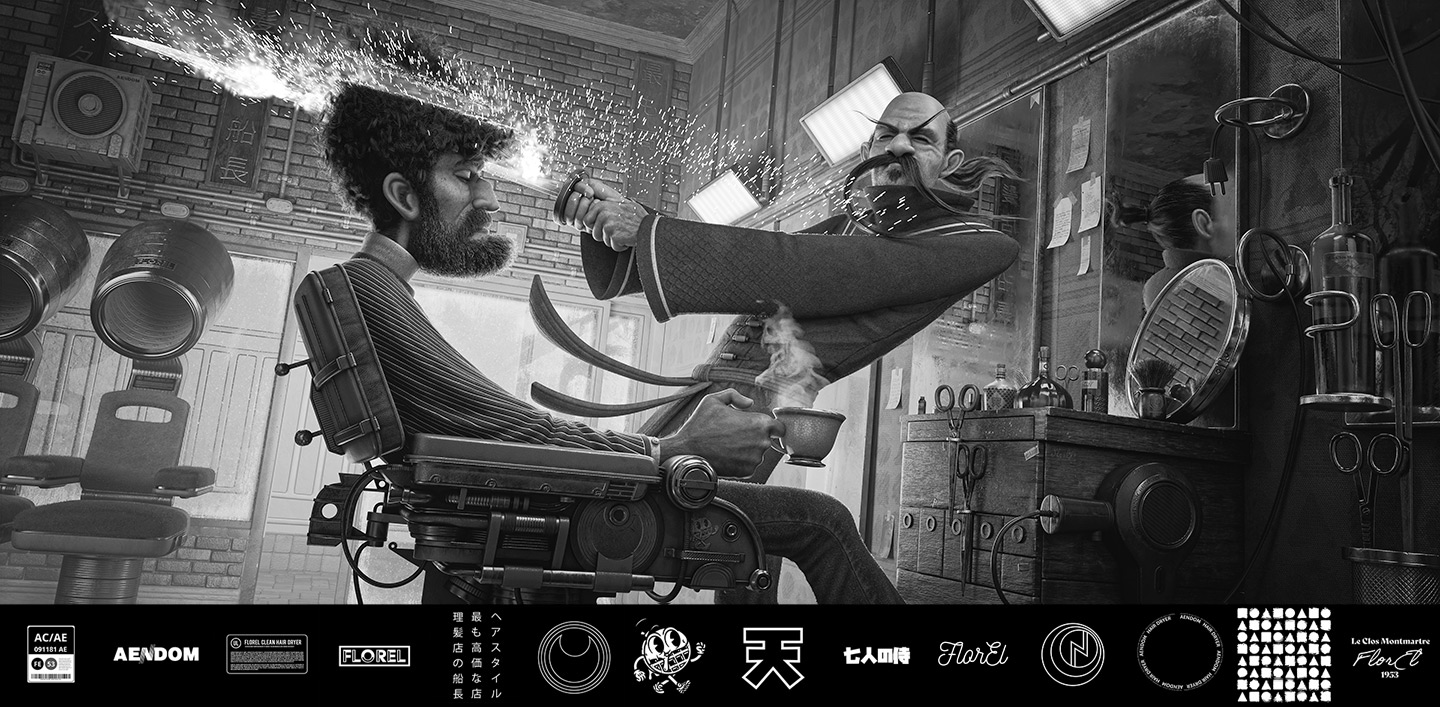
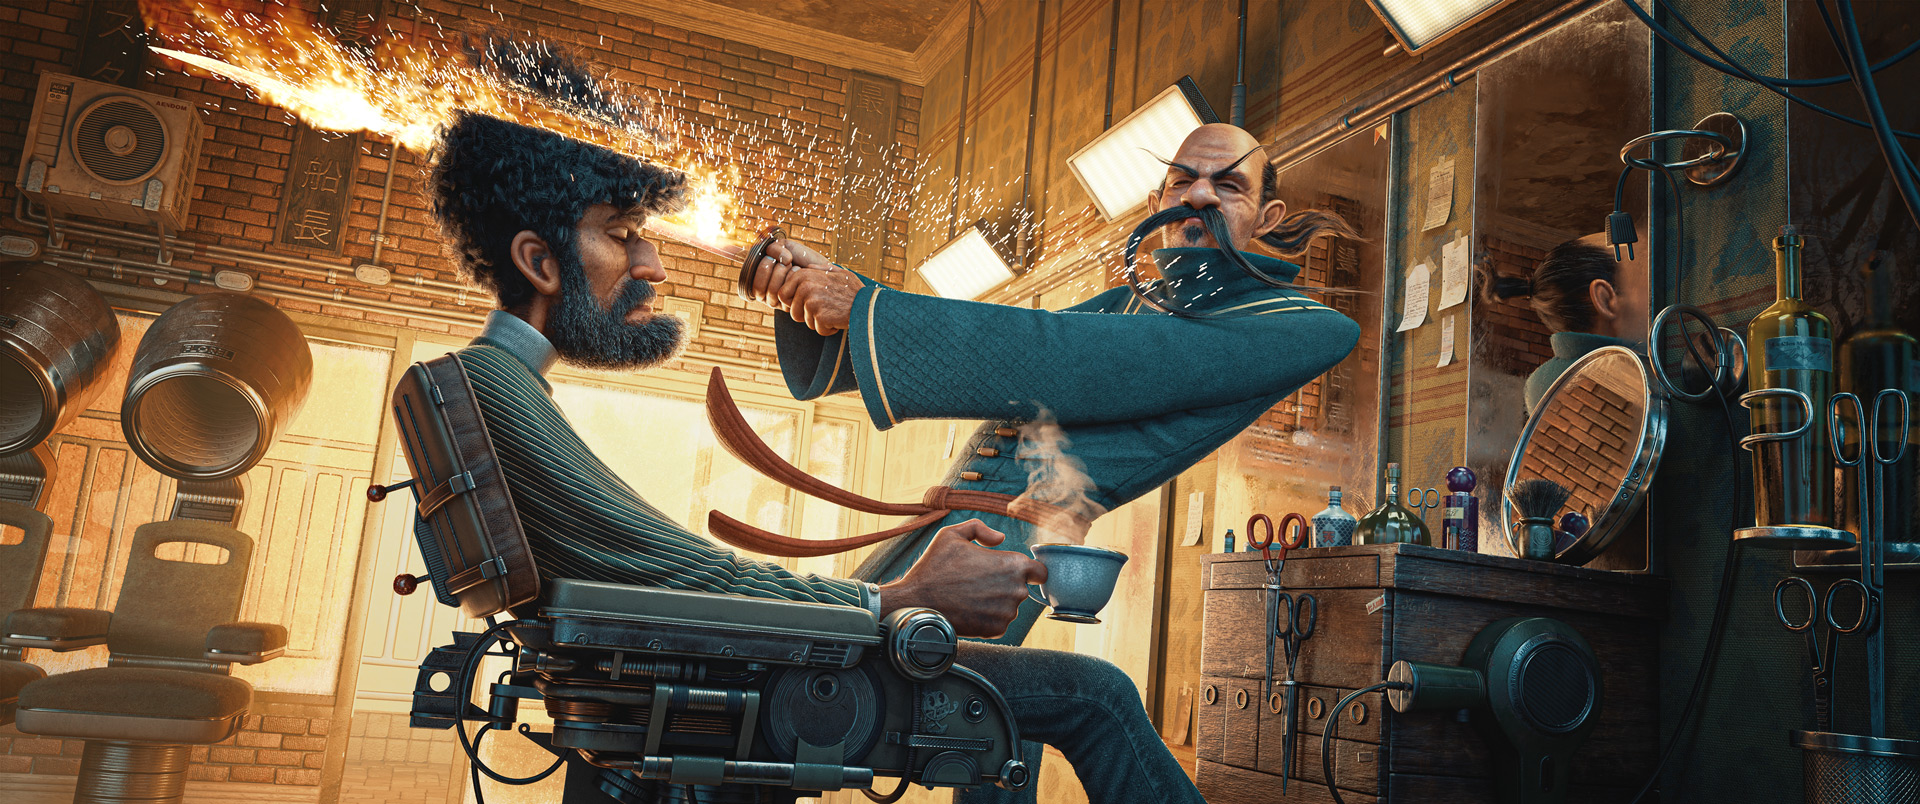
This concept is something different from what I have done before, and after seeing a lot of great ideas, One great image stuck into my mind. A powerful and funny emotion with a fantastic dynamic shot using a Dutch camera angle, clear tone values and an epic anamorphic camera format. This concept was a must-do.
1.3 The Artist
Nikolai Lockertsen has worked in the film industry and VFX since the late 90s
As a professional concept artist, illustrator, animator and matte painter, he has worked on over 30 feature films, tons of tv productions and commercials. So if you want to see more of his incredible art, check out his social media.
1.4 Folder Structure
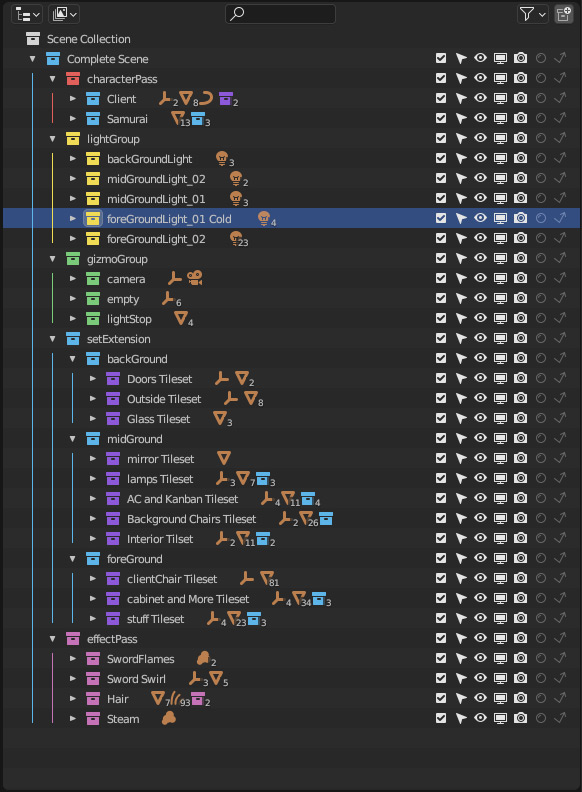
Use Collections to make faster decisions, move and append stuff, and more
Working in Feature Films, I noticed a particular folder system to work better as a team. For this project, I used five collections with sub-collections.
CharacterPass: it’s self-explanatory, and there you put your characters.
SetExtension: Set your scene. In this case, I divided the scene into background, midground and foreground.
GizmoGroup: Camera and Empties.
LightGroups: For Light groups
EffectPass: For GeoNodes, VDBs and more.
(+) Zoomable Image
1.5 Controller
Control multiple objects simultaneously with an empty
Parent various objects to an empty. First, create an empty, select all the meshes, and lastly, select the empty and press “Control + P” to Parent. Also, If you want to unparent an object, use “Alt + P”.
1.6 Addons / Plugins
Some Addons fasten our workflow, while others make the process much better or even possible
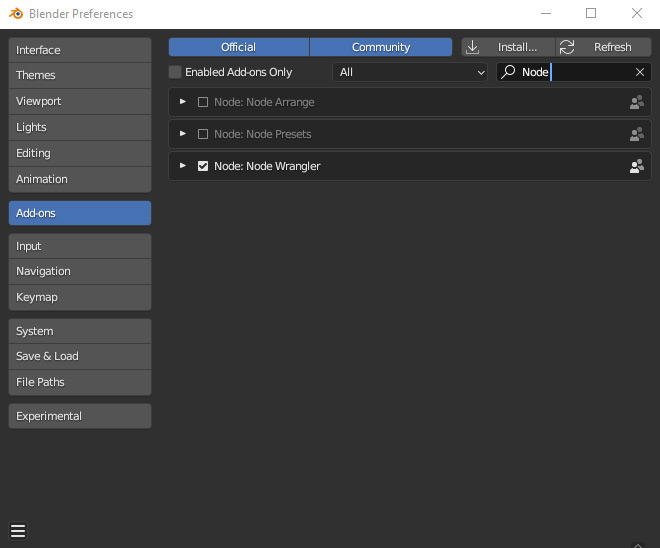
On the side of Free Addons, I used Node Wrangler(1.6.1), which is preinstalled in Blender. Just activate it. The Addon TexTools will make my UVs tight. You need to download and install it manually from this link.
On the paid side, Medusa Nodes(1.6.2) is a straightforward way to create hair, this Addon uses Geometry Nodes as a foundation, so if you understand the basics of GeoNodes, you can modify this Addon to your specific needs. (Blender 3.3 & 3.4 Compatible)
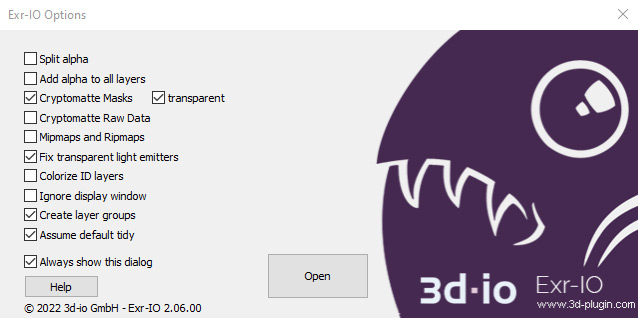
To open EXR Images in Photoshop, use the free plugin Exr-IO(1.6.3) from 3d-io. With this, you can open EXR files and have all the render passes with extremely high quality.
(+) Zoomable Image
1.6.1

Linked Image
1.6.2
(+) Zoomable Image
1.6.3
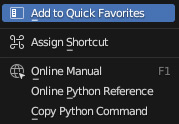
1.7 Quick Favourites Menu
Speed up your workflow in a significant way
To add something to the menu, right-click and select Add to Favorites Menu. Keep in mind that the menu changes depending on the mode you are in. To use it, press “Q”.
Modeling
Blender 3.4 & 3.5

2.1 Blocking
The easy way to make a complex scene is to tackle the simple forms first
Having a specific order is optional, but I always go for the easy forms first and the hard ones last. Also, I divide the meshes into different collections, Background, Midground and Foreground.
Finding Selected Objects
If you select an object in the Viewport, you can find it in the Outliner using “Numpad .” and the other way around.
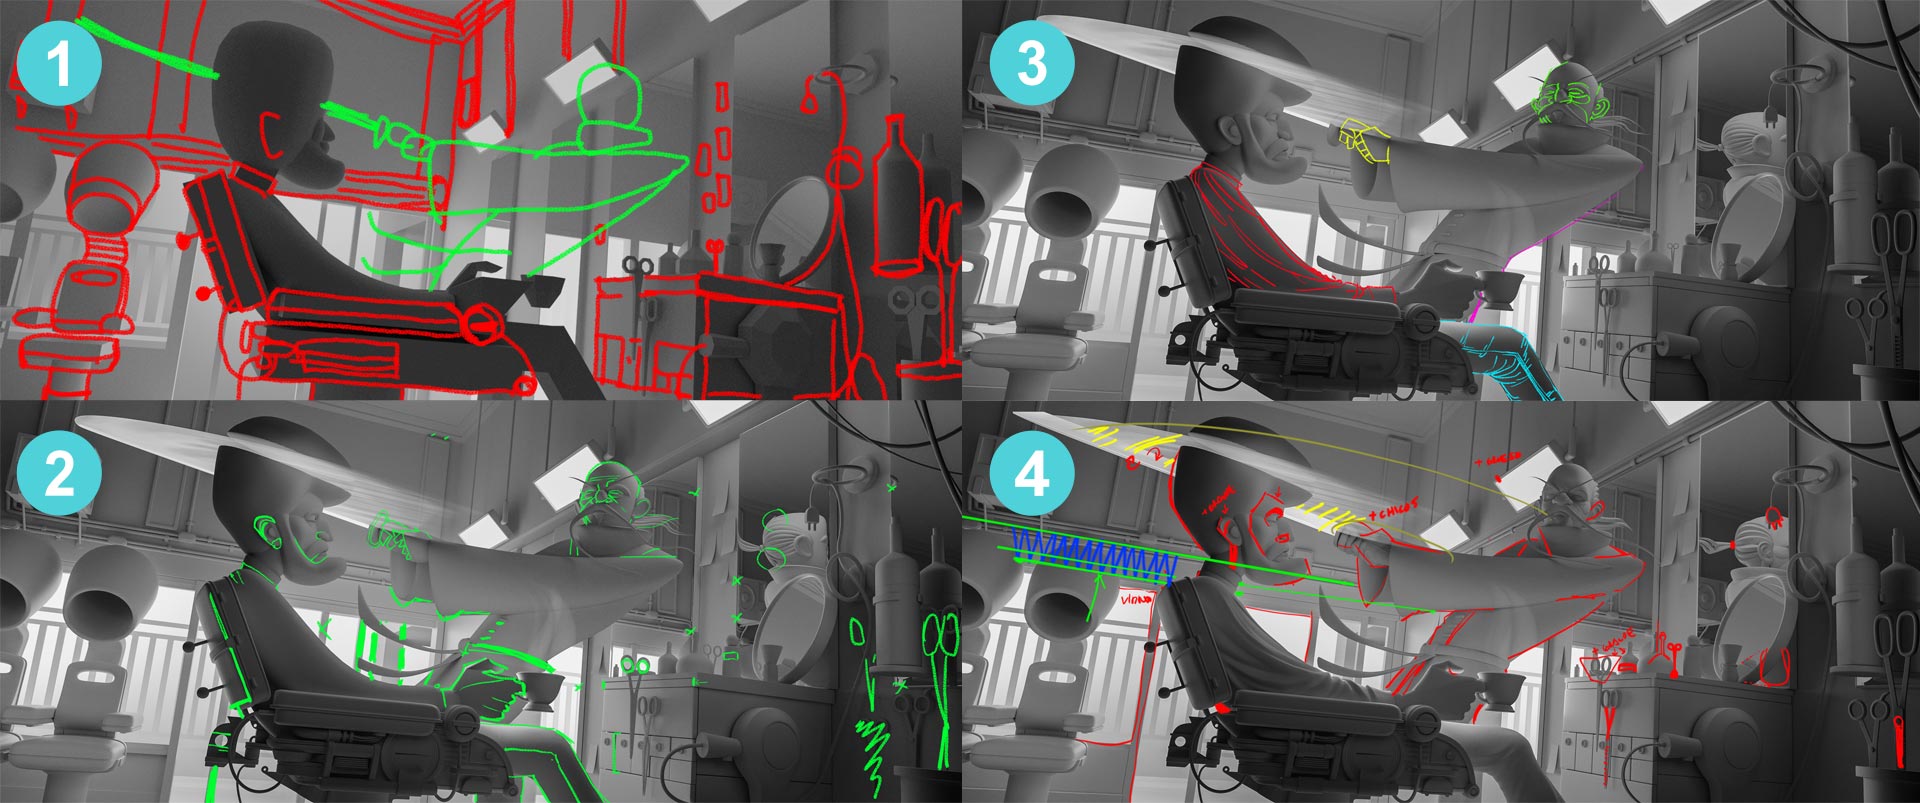
I use a lot of Visual Thinking, when I have a new render test of the WIP (Work in Progress), I draw over the missing parts so it’s clear what to focus on next.
Copy in Bulk
Copy Modifiers, Materials, UV maps and more. Use “Control + L”
2.2 Sculpting
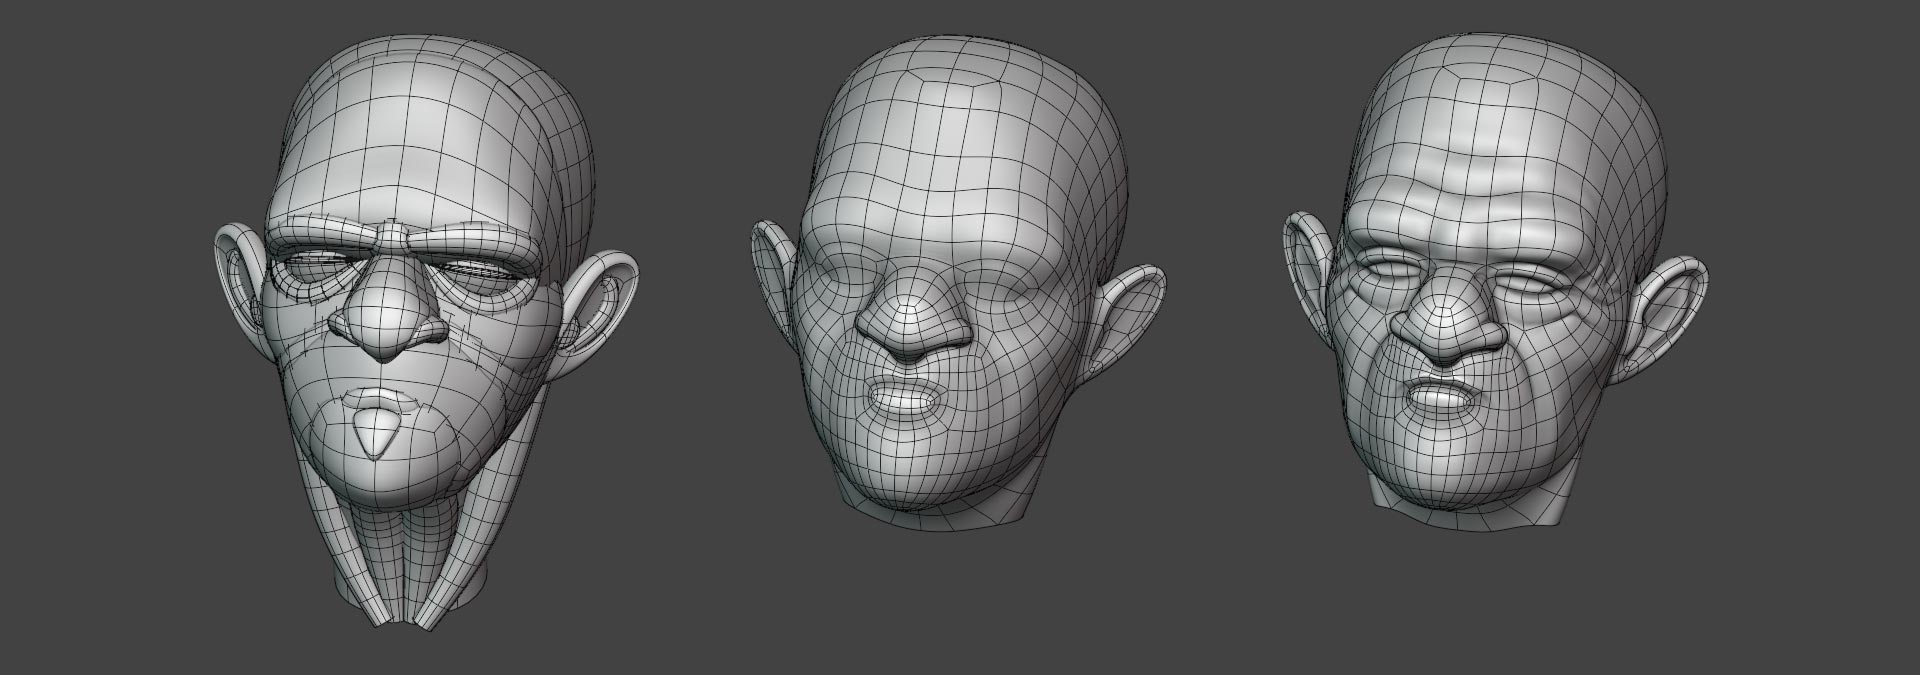
use the Sculpt Method for organic forms, focusing on shapes, not the topology
1. Use primitive meshes to get the basic shapes. After that, join them together with “Control + J”
1. Make a Retopology
1. Sculpt the final shape with the Multiresolution modifier
2.3 Vertex Groups
Vertex Groups have vast uses in Blender. I will show one of the few times I have used them in this project
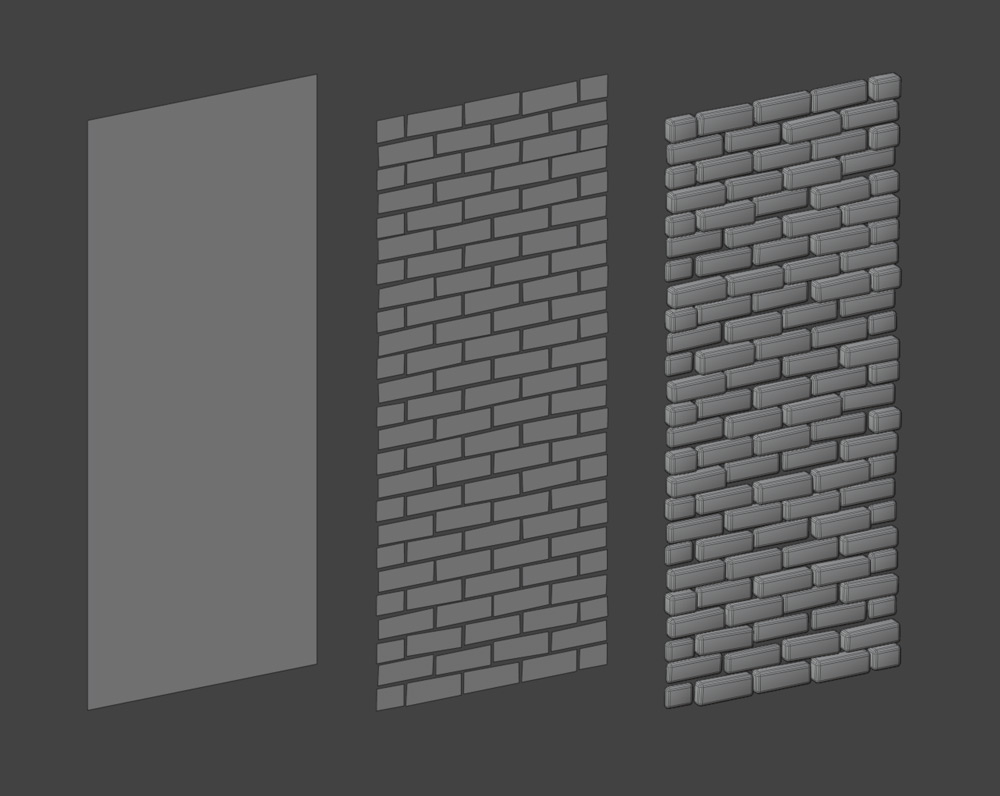
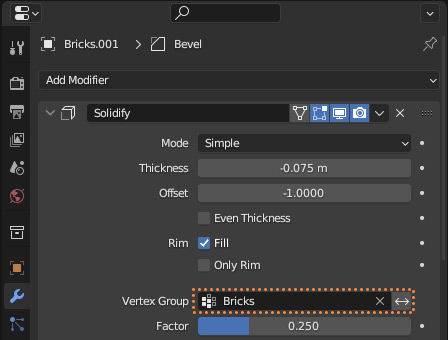
The brick wall in the Background started as a plane, then divided into small planes, and the Modifier Solidify with Random Weight Strenght was added. (2.3.1)
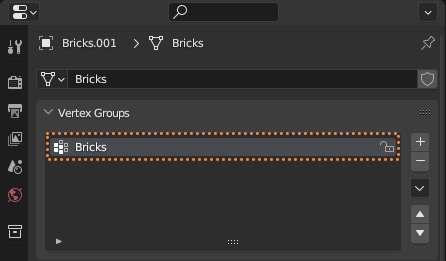
To do this, go to Properties > Object data Properties > Vertex Groups and create a Vertex Group. In this case, I name it Bricks (2.3.2)
Go to Edit Mode, select random planes, Select > Select Random and determine the weight. I usually use four values (.25, .50, .75, 1) for different planes.
In the Solidify Modifier, go to Vertex Group and select the Vertex Group you created before, in this case, Bricks (2.3.3)
(+) Zoomable Image
2.3.1
(+) Zoomable Image
2.3.2
(+) Zoomable Image
2.3.3
2.4 Basic Uvs
The better the UVs, the better the textures
There are some things to think about when doing the UVs
1. Apply Transform: Always apply All Transforms with “Control + A” to avoid scale errors.
2. Make a UVs Material: To see the quality of the UVs, create a material with colored UVs.
3. Face Orientation: It’s easier to texture if you have the same orientation on every UVs.
4. Smooth Types: If you are having some pinching problems in the UVs, try different Smooth Types.
5. Texel Density: You want a uniform Texel density, but sometimes it’s impossible. For this project, I divided it into Four areas: the BG with the lower texel density, the midground with a mid-texel density, the foreground with a big texel density, and the faces and hands with the highest texel density.
6. TexTools: With this Addon, you have several tools at your disposal, but the main ones I use are Rectify and Align.
Texturing
Substance Painter, Substance Designer, Illustrator & PureRef
3.1 Gather Reference
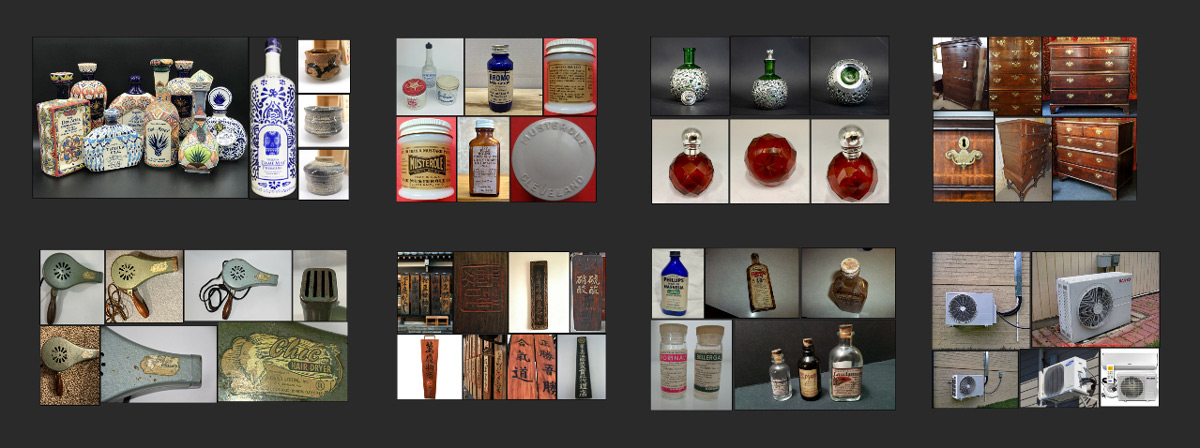
Having all the images together divided by concept is one of the best things that I noticed using PureRef
Go to multiple sites like Pinterest, drag and drop images of all sorts (webp is supported) and divide it into different concepts, like texturing, illumination or anything relevant to your project.
You can find all the shortcuts on their webpage, but my favourites are:
Align Left: Control + Left
Align Top: Control + Up
Normalize Size: Control + Alt + Up
Arrange Optimal: Control + P
(+) Zoomable Image
pureref.com
3.2 Adobe Substance 3D Assets
To source or not to source is not even a valid question
I’m a proponent of making your materials from scratch, but if you have access to excellent materials, use them as a starting point and change it to fit the project and add more details. Also, you can learn how other people create smart materials. The Adobe Substance 3D assets library is a great resource I used for this project.
3.3 SBS or SBSAR
A better understanding of what file works with each program must be understood
Substance Painter (SPP) and Substance Designer (SD) are two different software applications developed by Allegorithmic (now owned by Adobe) for 3D texture painting and material creation, respectively.
SBS stands for Substance Designer graph file, which is a file format that contains the nodes and graphs used to create a procedural texture or material. This file can be opened and edited in Substance Designer.
SBSAR stands for Substance Archive, a file format containing a compiled version of a Substance Designer graph file. This format exports procedural textures and materials that can be used in other software applications that support the Substance engine, such as Unreal Engine or Unity.
In summary, SBS is the editable file format used in Substance Designer, while SBSAR is the exportable file format used to distribute procedural textures and materials created in Substance Designer to other applications, like Substance Painter, Unreal Engine or Unity.

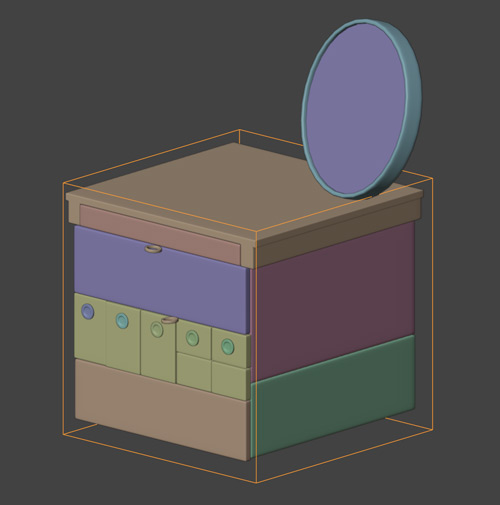
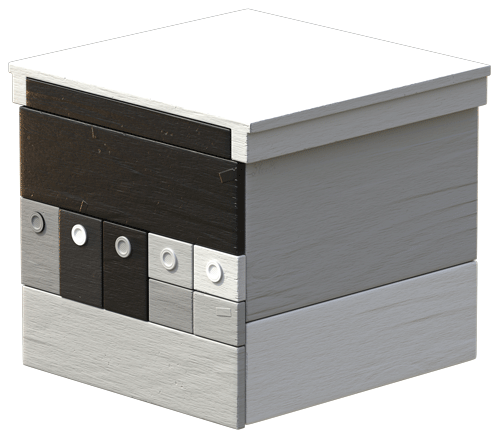
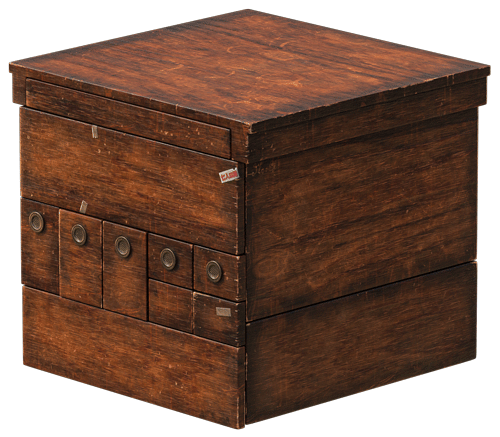
3.4 UV Random Color
It is a generator that masks every UV Island differently
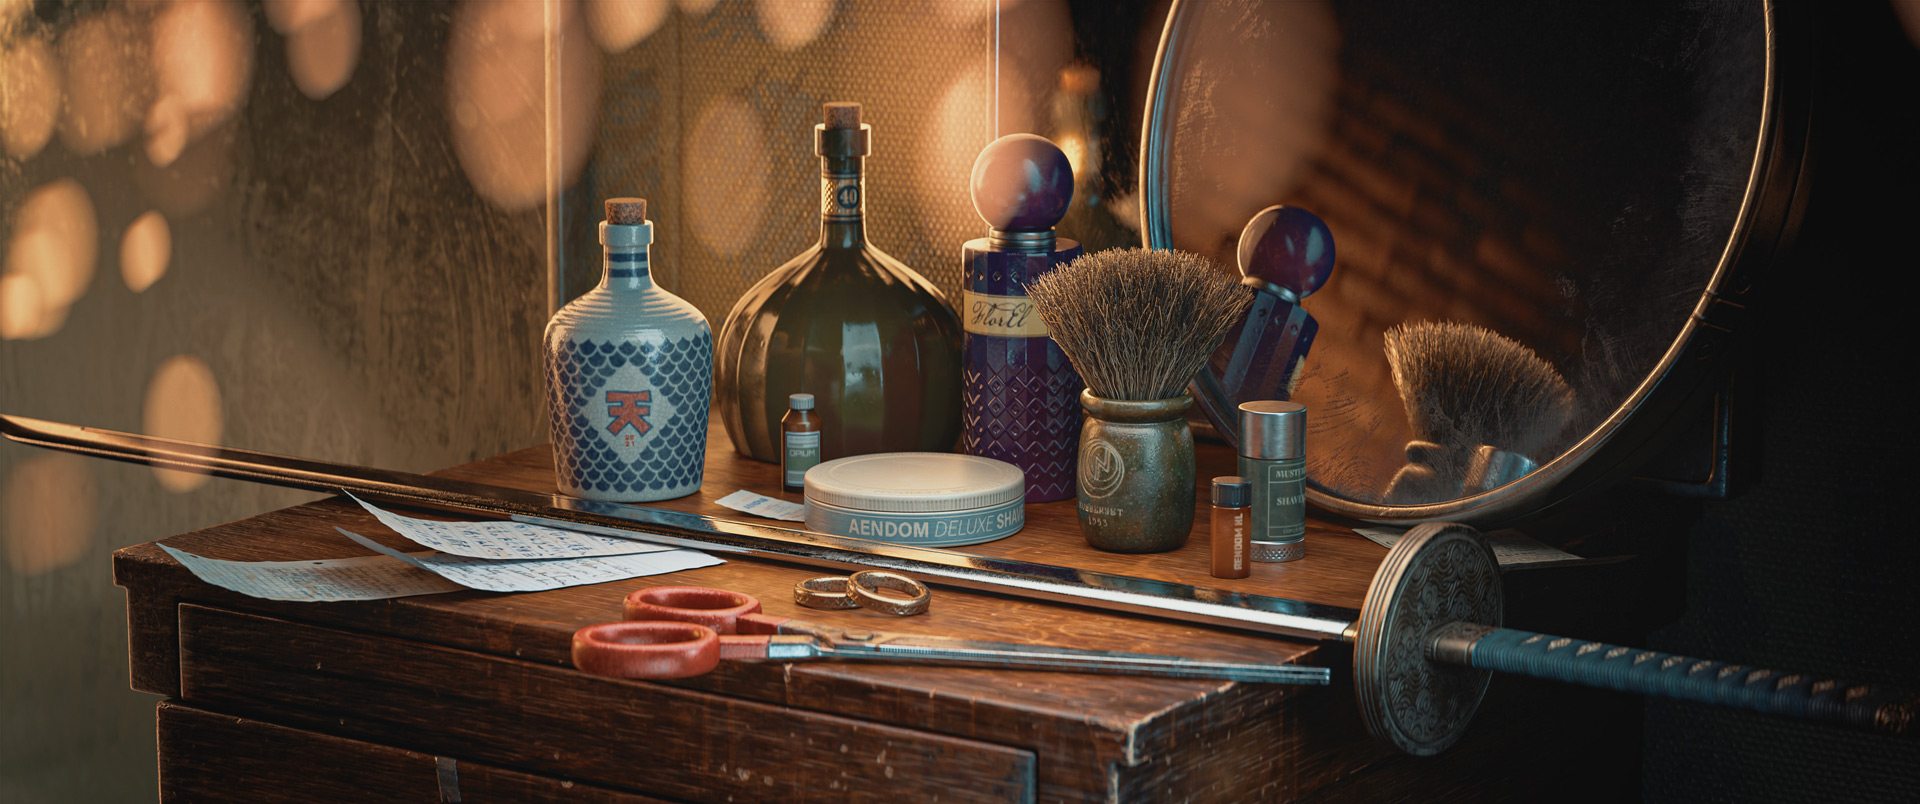
Use this to get a more natural variance between objects of the same material. In this project, the wood cabinet has a different tone for each wood part, and every brick in the background wall is slightly different.
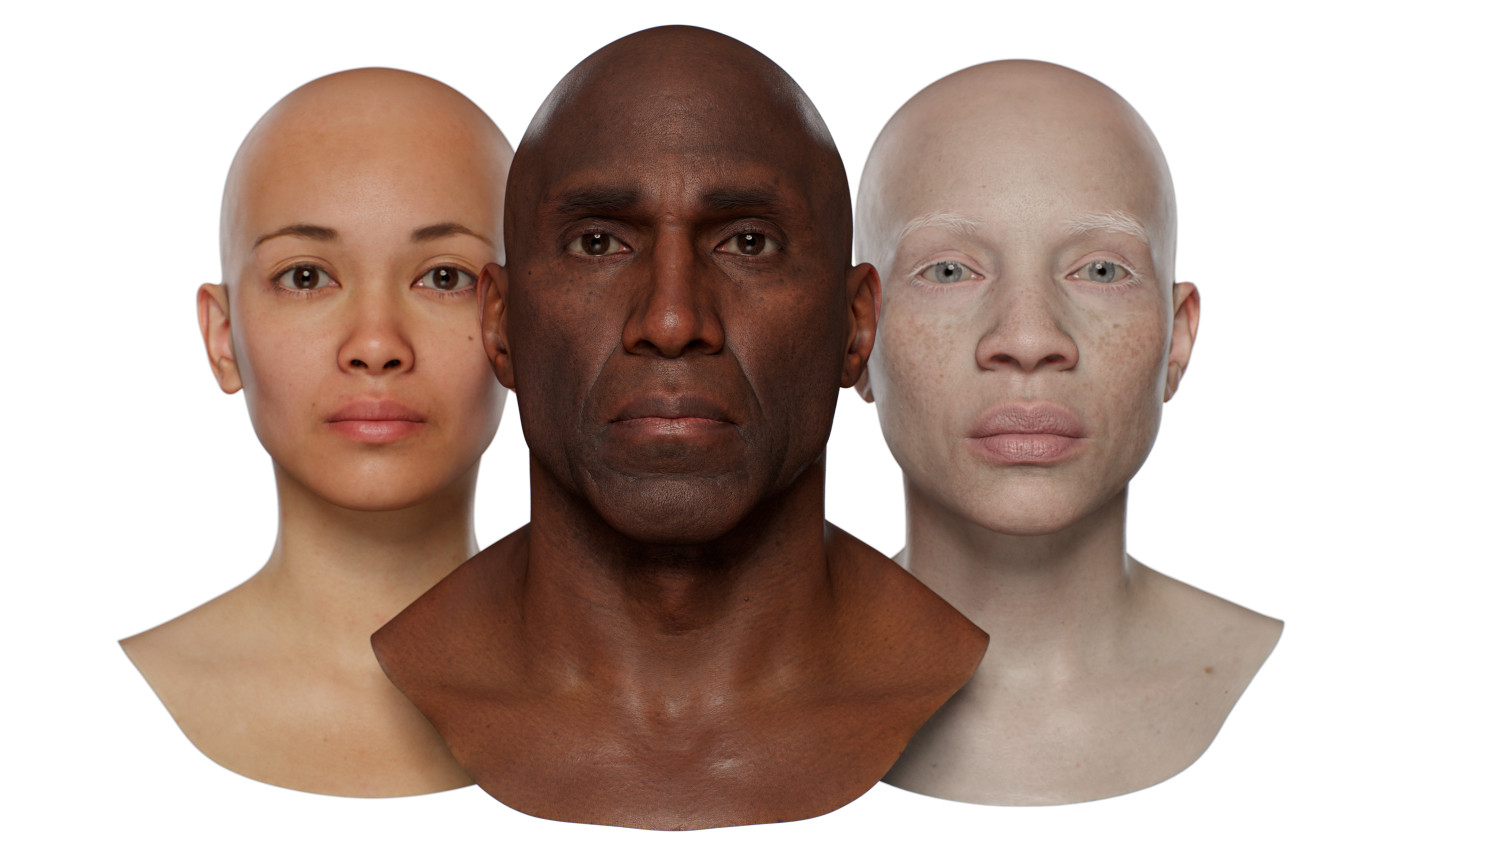
3.5 Skin Textures
I wanted to test Scanned skin textures for this project
Several companies do this, I used the 3D Scan Store for this, and it worked like a charm, I didn’t know if the normals were for OpenGL or DirectX, but I noticed that the normals were weird, so I inverted the levels of the green channel of the normal map to fix the issue.
3.6 Alphas
If you want to take control over the textures, using alphas is the way
Instead of drawing in Photoshop, I prefer Illustrator to create alphas. These images are in Black(#000000) and White(#ffffff), and I use them in 4K, so I never lack detail.
(+) Zoomable Image
3.7 Bit Depth
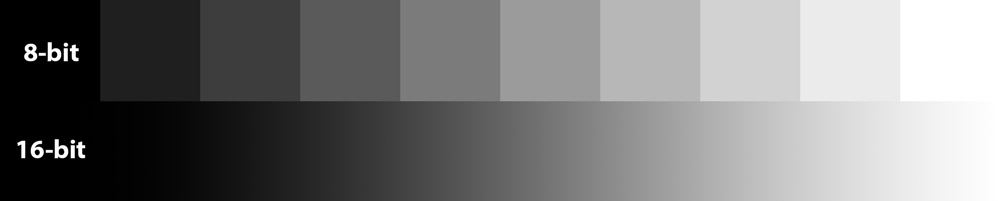
Use 16-bit instead of 8-bit
For a long time, I didn’t know the difference between them, and I got a very jagged and stepped displacement, and the only thing I needed was to export maps in 16-bit instead of 8-bit.
The main difference between an 8-bit image and a 16-bit image is the amount of color information they can store. An 8-bit image can hold a maximum of 256 shades of each color (red, green, and blue), resulting in approximately 16.7 million possible colors. A 16-bit image, on the other hand, can store up to 65,536 shades of each color, resulting in a total of approximately 281 trillion possible colors. The advantage of using a 16-bit image is that it can store more color information. However, 16-bit images also require more storage space than 8-bit images. Some of the most common file formats for 8-bit images include JPEG and PNG. For 16-bit images, the most common file formats include EXR and TIFF.
Not all maps benefit from this. Even though you can export all the texture maps at 16-bit, the maps that need it the most are: Displacement, Height, Normal, Roughness, Specular and Metallic.
Warning
Remember that this is focused only on making texture maps for rendering images. These formats are not optimal for game development because the filesize will be problematic.
3.8 Personal Export Preset to Blender
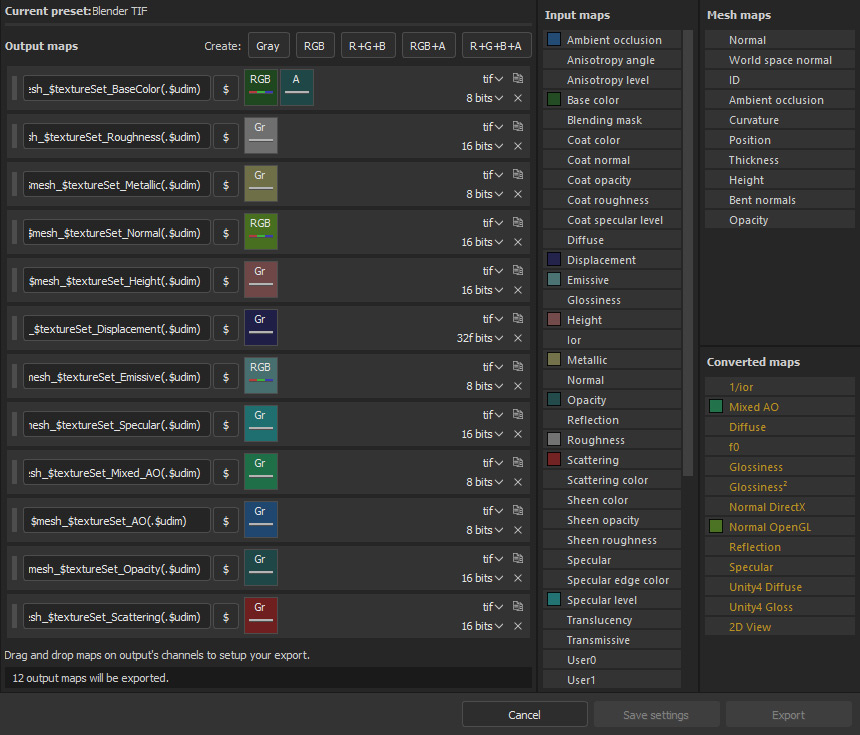
I use a mix of 8-bit and 16-bit images using the tif file
This does not work for all export presets, but this project was a fit.
Shading
Blender 3.5
4.1 Texturing & Shading
Is there a difference between them?
Texturing is the process of adding a two-dimensional image to the surface of a 3D model. Shading, on the other hand, is the process of determining how light interacts with the surface of a 3D model.
There are some limitations in texturing, you can not add a fresnel effect to a texture, but you can do this with a shading technique. In short, use Shading techniques to control the behaviour of the surfaces.
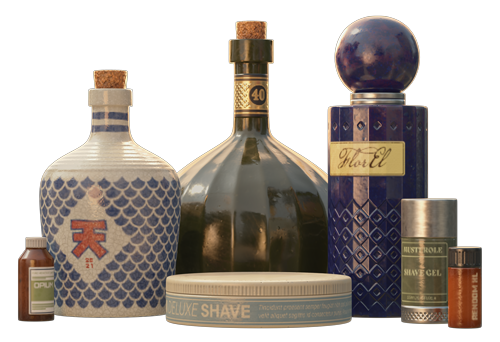
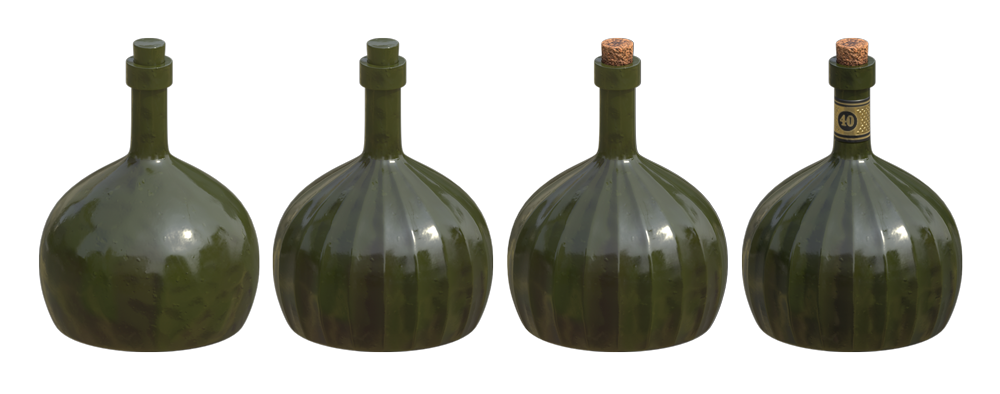
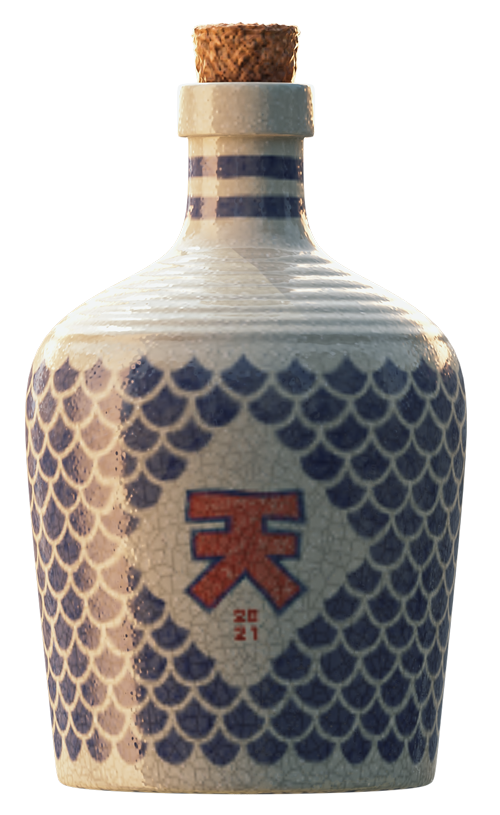
I used the wine’s exported texture(Left) in this project and added some shading techniques to get the final version(Right).

4.2 Basic Shading Nodes
Modify or improve a texture without the need to redo them again
Using nodes in the shader editor will help you out with this. There are a ton of nodes, but I will mainly focus on some elementary ones to perform some changes.

Hue Saturation: Change the Albedo non-destructively.
Map Range: Change the Roughness Map non-destructively.
Mix Color: Mix multiple Albedos, or mix it with an Ambient Occlusion.
Fresnel: Use as a mask for a physically accurate fresnel effect.
Layer Weight: With this one, you can achieve an unreal fresnel effect.
Noise Texture: Add extra noise to the texture with this one.
You do not need to use them all, but at least start playing with each one. Eventually, you will know how to use them to your advantage.
Extras
Blender 3.4 / 3.5 & EmberGen
5.1 Hair System
Medusa Nodes Addon
After checking out the new system to create hair, I was ready to dive, but I found an Addon that makes this task a lot easier. This Addon is a payment one, and it’s worth it.
This Addon uses Geometry Nodes as a base system, so you can modify it if you understand GeoNodes. Remember that the supported versions of Blender are 3.3 and 3.4 for this Addon, but when finishing, you can open the asset with the 3.5 version without a problem.

Linked Image
Basic Workflow
1. Select the mesh.
2. Click on New Groom > Create Groom.
3. In the Generator tab, you can change the Lenght and Density.
4. Add the Guide Deformer to add some guides to manage the hair effortlessly.
5. Stack as many deformers as you want, like Noise, Curl, Clump and Trim.
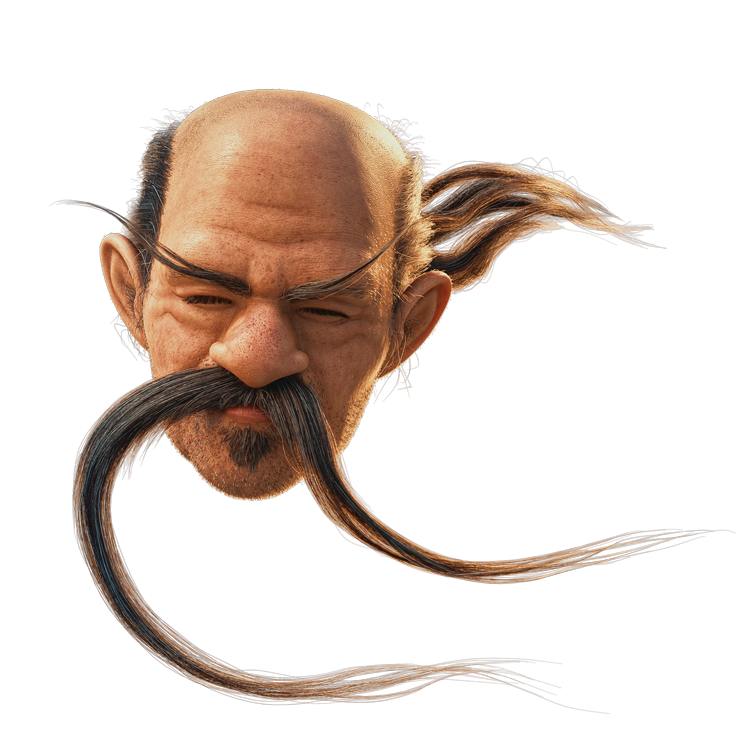
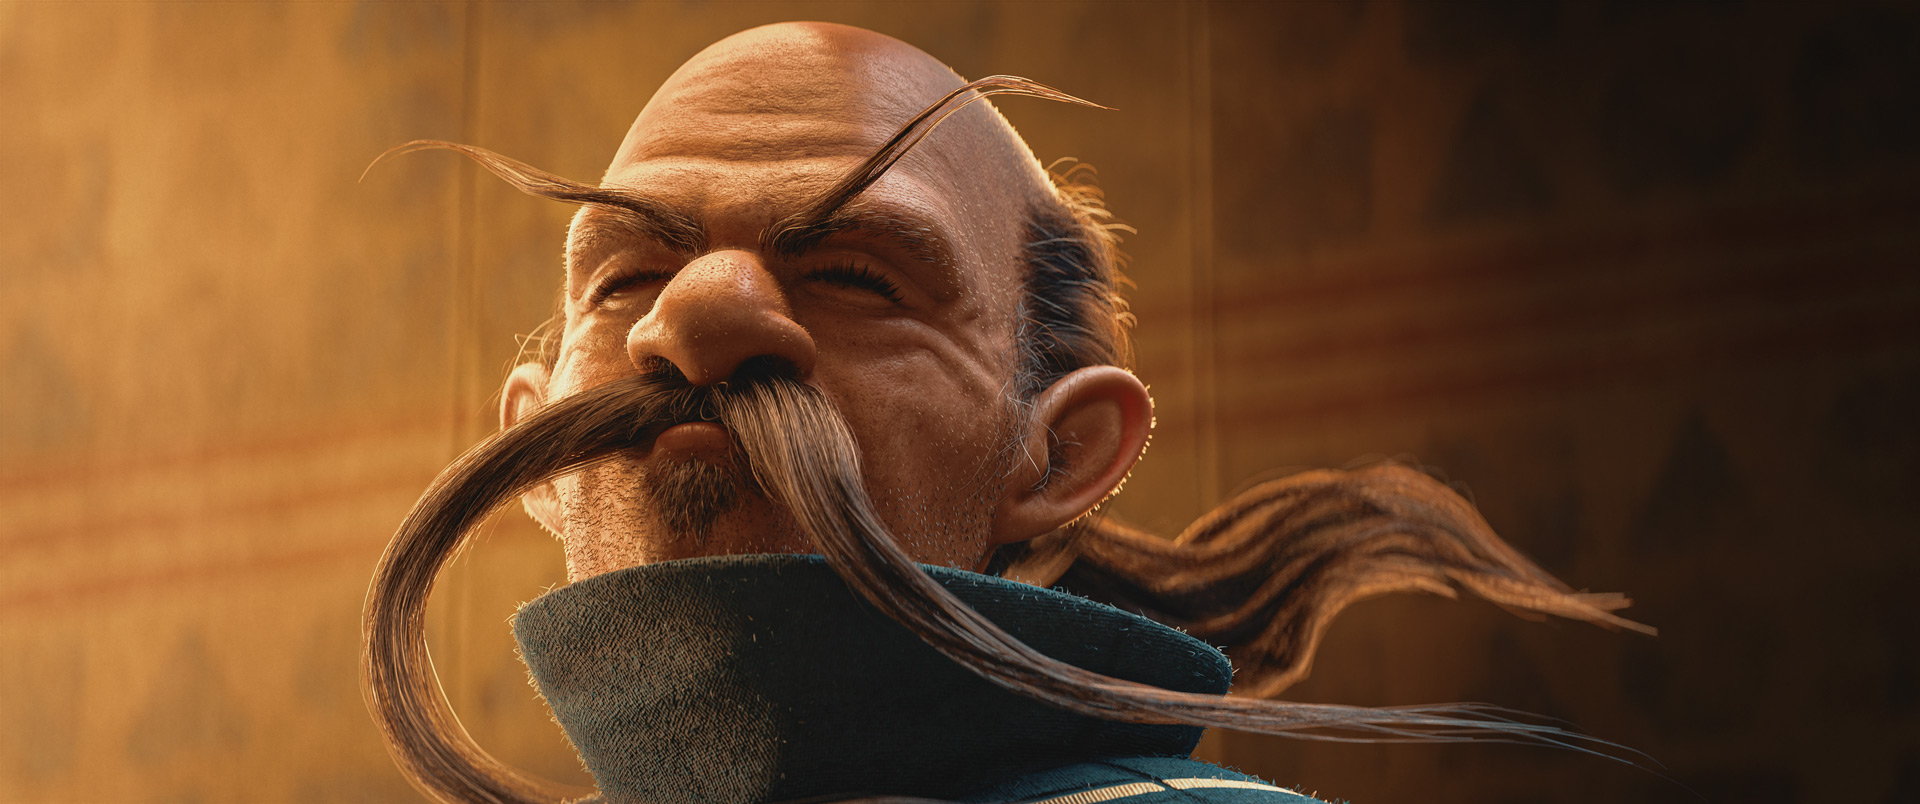
Samurai Hair
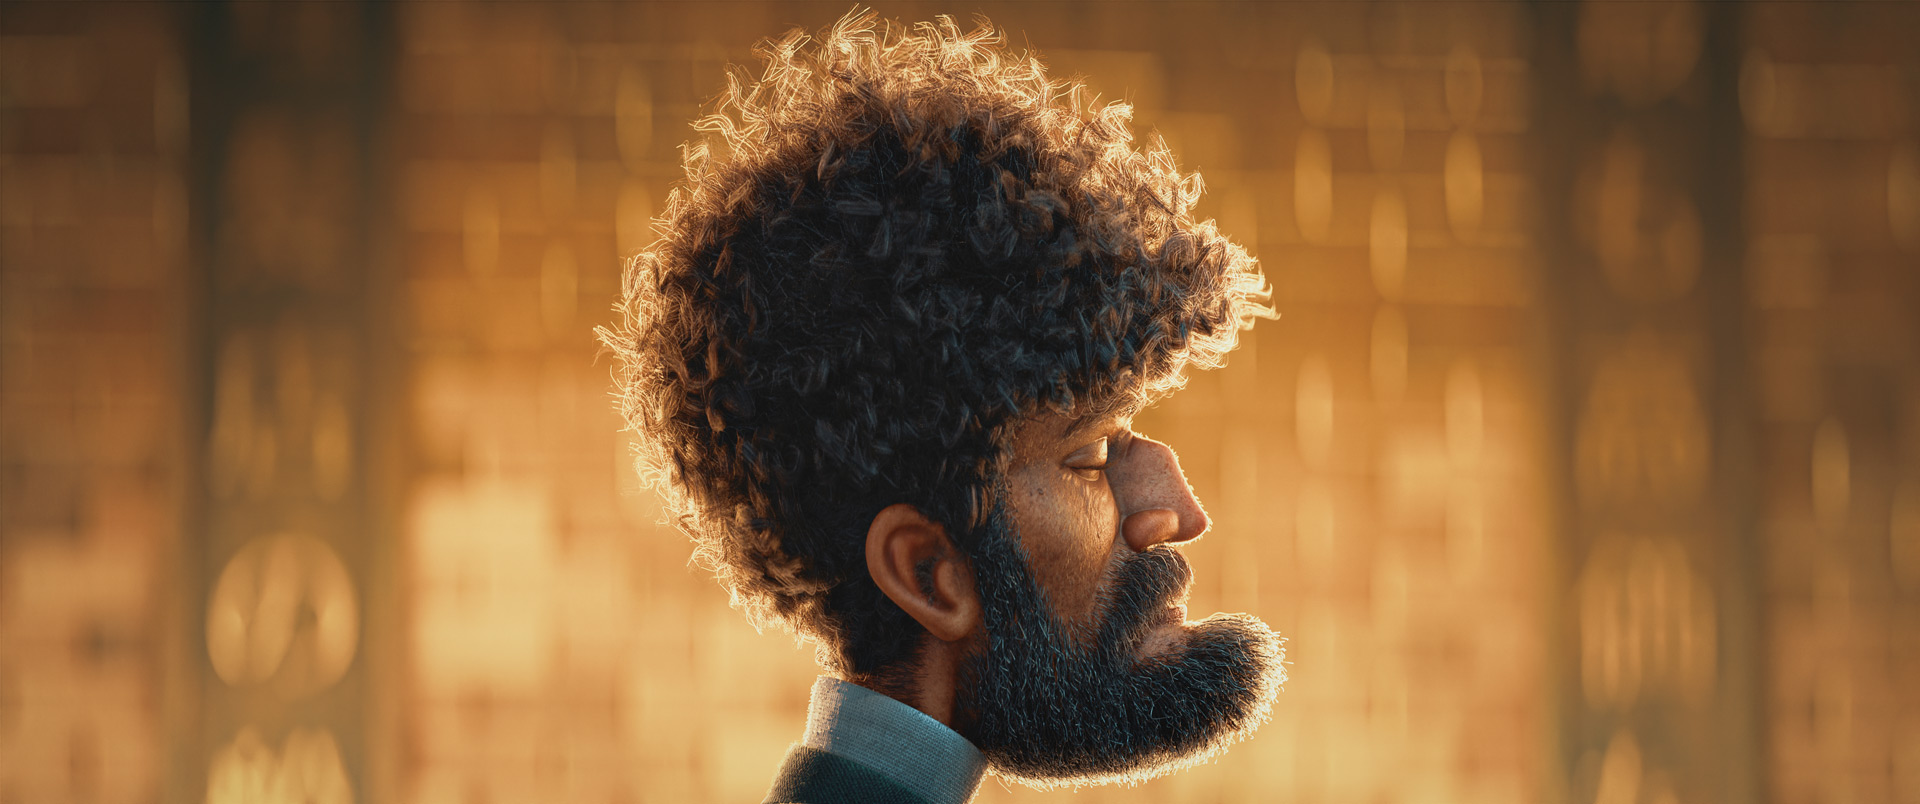
This system takes less amount of memory to make a complex hair system. For the samurai, the hair is divided into multiple parts:
1. Small Hairs
2. Pony Tale
3. Side Head Hair
4. Inner Ear
5. Inner Nose
6. Eyebrows
7. Eyelashes
8. Small Beard
9. Goatee
10. Moustache
(+) Zoomable Image
(+) Zoomable Image
5.2 Geometry Nodes
Create and modify 3D geometry in a procedural and non-destructive way using a node-based visual interface
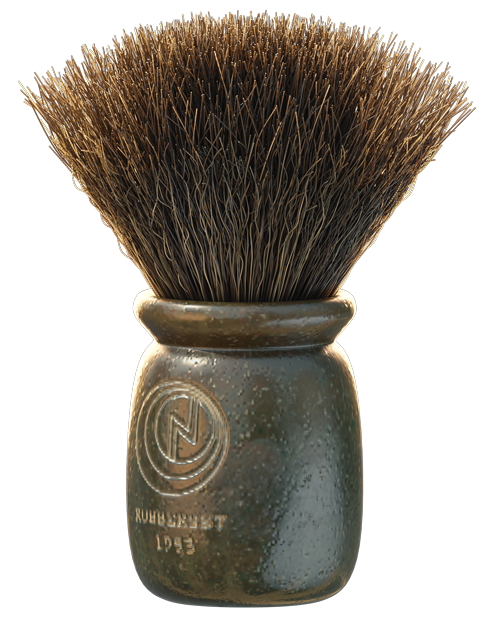
I used GeoNodes in multiple areas of the project, but I will show you one of the simple ones, creating the Rubberset Hair Particles.
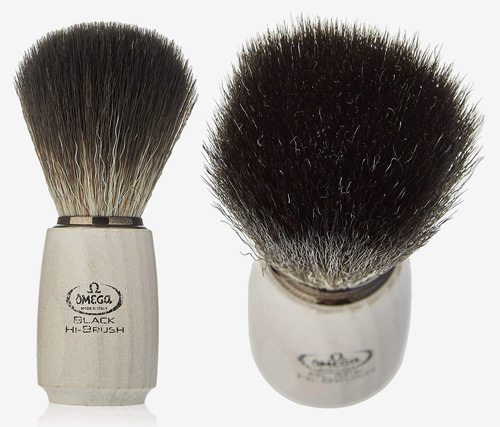
Gather Reference
Get the main idea of what you must accomplish. In this case:
1. Noise on the hair
2. A curve form on top
3. Two colors for the hair
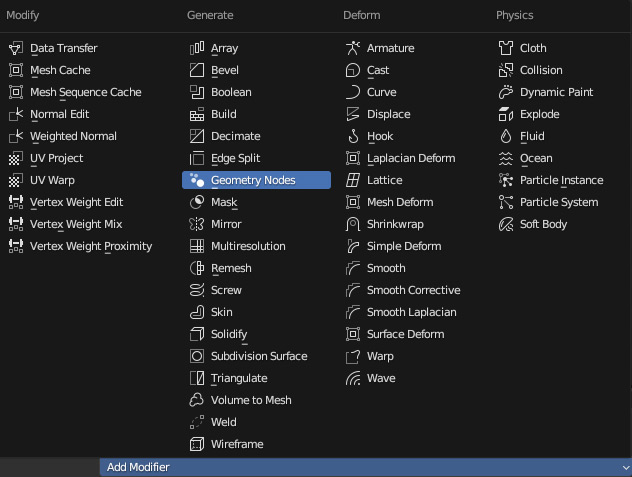
Create the Geometry Nodes Project
1. Select the Mesh and Add a Geometry Nodes Modifier(5.2.1)
2. Distribute Points on Selected Faces and use Curve Line as an Instance(5.2.2)
3. Resample the Curves Instances and Add some Noise(5.2.2)
4. Convert Instances to Mesh(5.2.2)
5. Set Material & Join Geometry(5.2.2)
(+) Zoomable Image
5.2.1
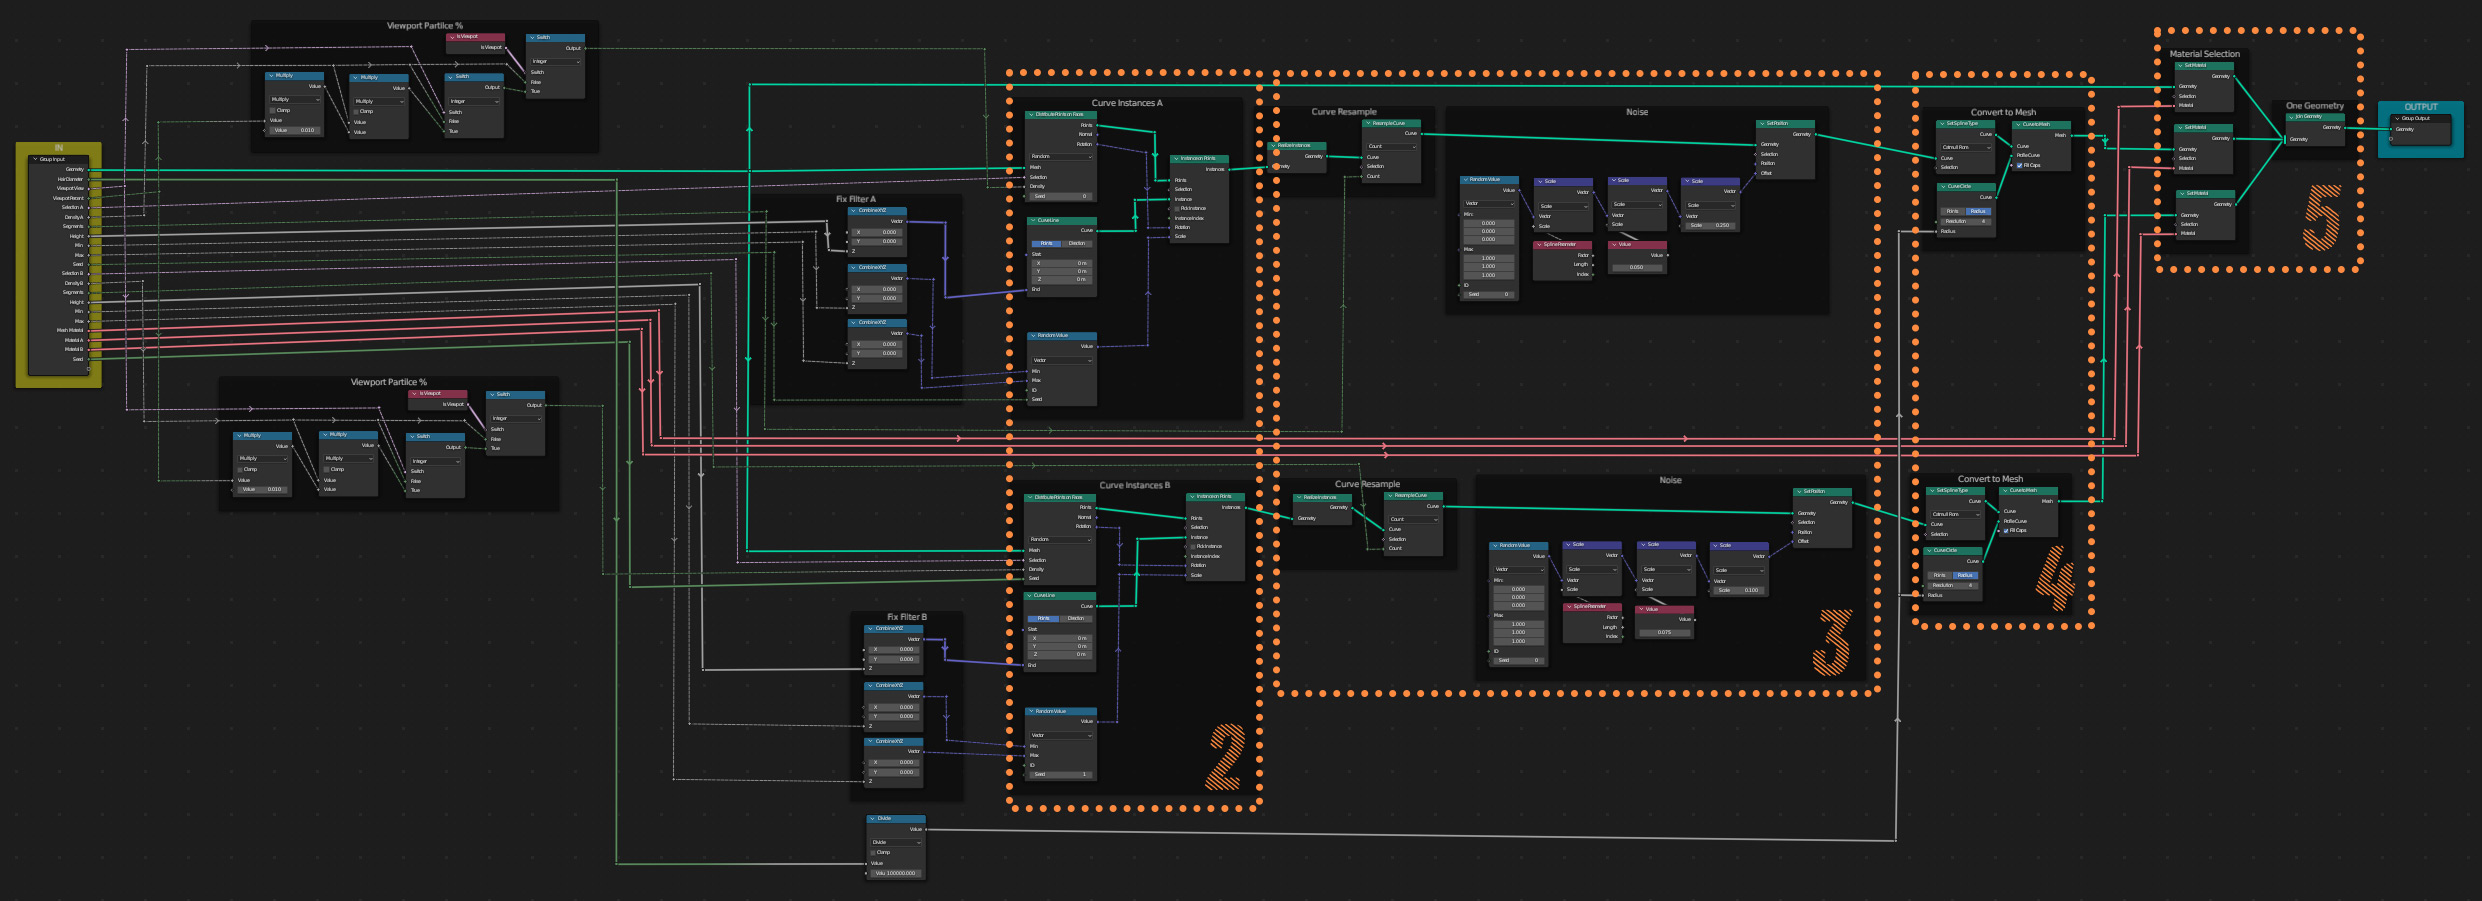
(+) Zoomable Image
5.2.2
Those Extra Nodes?
The extra nodes are not strictly necessary; I just used them to make the interface more user-friendly.

5.3 Steam and Fire
VDB Simulations with EmberGen
EmberGen is a real-time volumetric fluid simulation and particle rendering software. Making the coffee steam and the sword fire using EmberGen was excellent. The premade projects available were very helpful. I got what I wanted fast because the program is user-friendly, and you can export a frame range in a VDB format that Blender can use.
Instead of exporting just one frame, I exported 200 frames to select the best frame. Also, the trial period is more than enough to learn the basics of the software and get great results.

Rendering
Blender 3.5 & Photoshop 2022
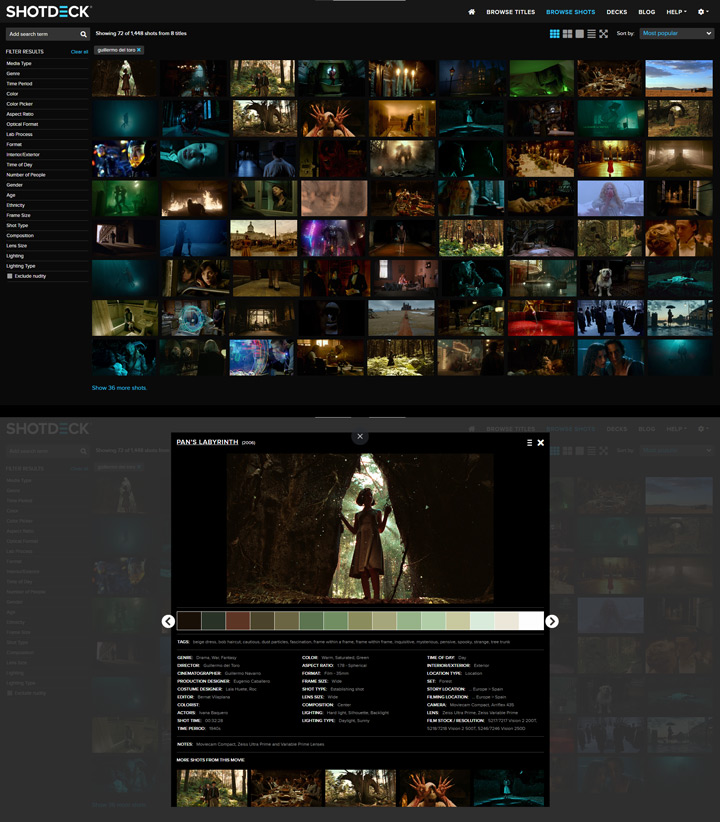
6.1 Shot Reference
To aspire to make a great image, you must learn from the pros
Shotdeck is the best and largest cinematic image database, in which you can search by Color, Aspect Ratio, Format, Lighting, Director or even Cinematographer. This essential tool will improve the composition of your ideas outstandingly for a price. And gives you important information about every shot.
(+) Zoomable Image
shotdeck.com
6.2 Lighting
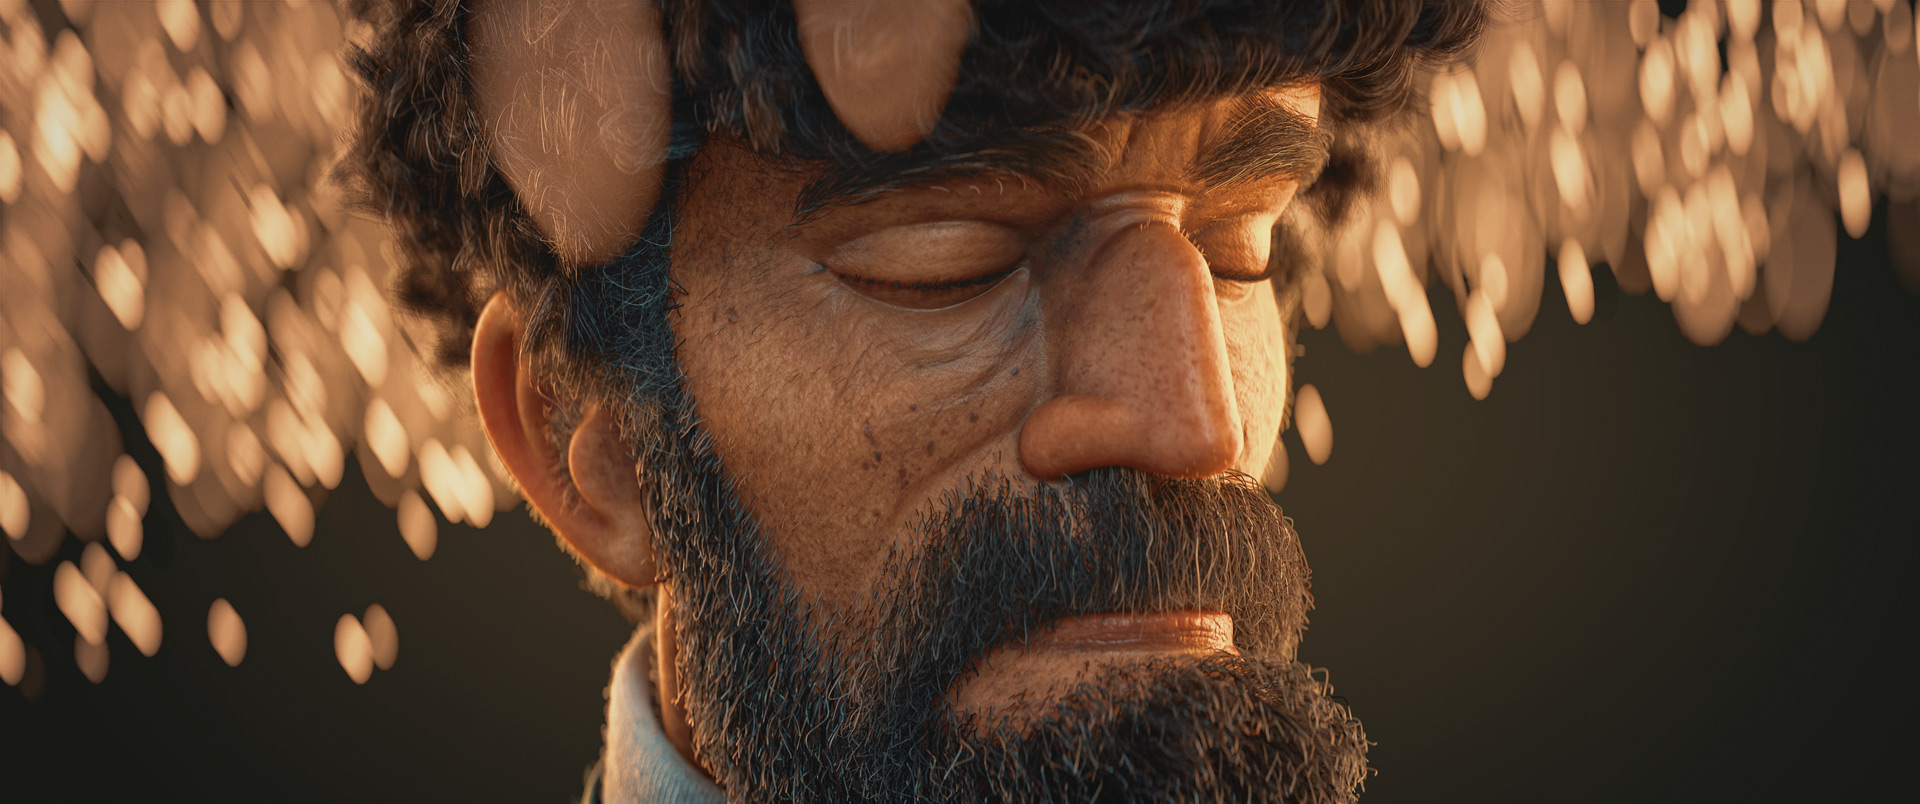
Lighting is a fundamental element of art
It helps explain form and color, and it is necessary to understand it to create different atmospheres and influence the viewer’s eye.
When creating an image, it is always necessary to think about Tonal Values and plan where to place the light and dark areas for maximum impact. Use them to guide the viewer through the image.
(+) Zoomable Image
The image gains strength if we have a substantial variation in these values, making it easier to know what to focus on. There are various combinations to explore with tonal values, and each combination balances the use of light and shadow differently to generate different moods and drama.
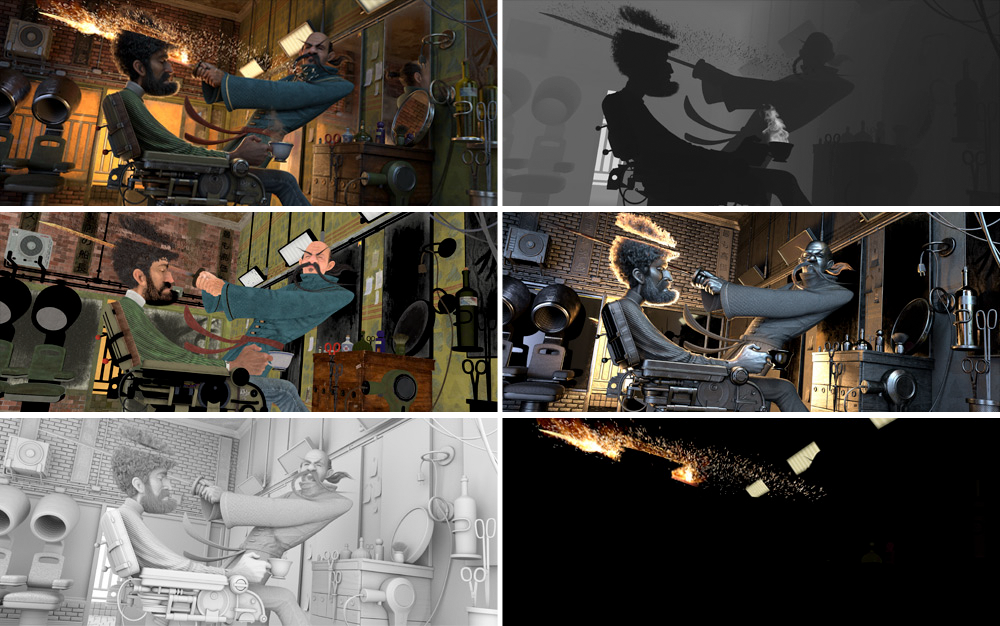
In this project, the concept art is a High Key + Dark Accent tone value combination, in which most of the values are medium and high, generating a clear image. But it has a dark accent, which is the most crucial part, the characters.
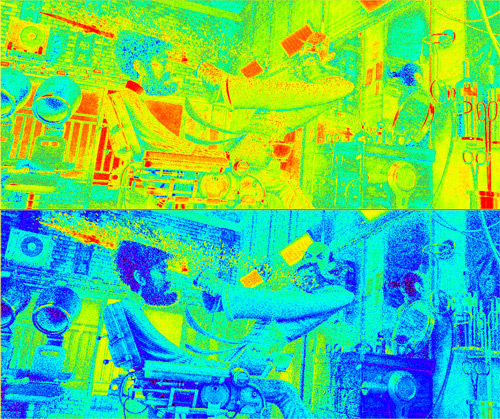
6.3 False Color
This tool makes it easier to identify areas of your scene that might be overexposed or underexposed
This color management tool is available in Blender, allowing you to visualise your scene’s luminance or brightness values more intuitively. It’s very helpful when you’re trying to balance the lighting of your scene.
In the image above, we have an overexposed illumination and in the image below, a more balanced illumination.
6.4 Light Groups
Divide all your lights into groups
When you render the image, you will have your composite image and every light group separately. It is an excellent tool for post-production because you have more control over the image.
1. To work with this, go to View Layer Properties > Light Groups and Add as many groups as you need.
2. Select each light source, go to Object Properties > Light Group and select one of the groups you made before.
Thank Juan Gea of Bone Studio for making this possible and Alex Fuller for coding this great tool. This tool is a game-changer

6.5 Render Passes
Separating the render into individual passes allows you to manipulate and fine-tune the final image in post-production
Each render pass represents a specific aspect of the image, and Blender offers a wide range of render passes, which can be accessed and customized in the View Layer Properties > Passes. For this project, y selected these:
1. Combined: To have all the render passes in one image.
2. Denoising Data: Mix with the Combined Pass and get a new denoised version of the image.
3. Mist: Calculates depth from the camera.
4. Diffuse Color: A flat color of the image.
5. Glossy Direct: To compose direct reflections in the image.
6. Transmission Indirect: To improve glass materials.
7. Volume Direct: To Increase the amount of steam of the coffee.
8. Emission: To have the emission objects separately.
9. Ambient Occlusion: To add dirty creases to any object.
10. Cryptomatte Material: to have an easy selection for each material
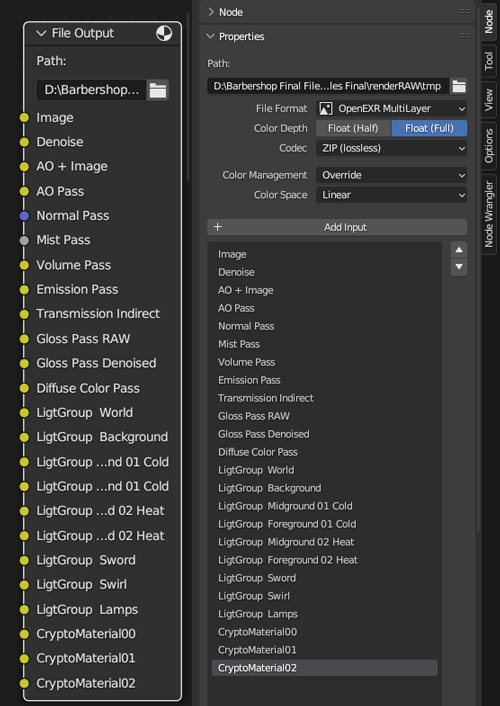
6.6 File Output
Export all render passes and light groups or modify them automatically
The File Output node in the Compositor of Blender allows you to save the final result of your composited image file. You can also specify a file path for the output, allowing you to save the file to a specific location on your computer. You can put as many inputs as needed. In this project, I put the denoised image and the raw version of the image, all the render passes denoised, all light groups denoised and the Cryptomat. And export it as an OpenEXR Multilayer in 32-bit. (Maybe 32 bit was too much, with 16 being more than enough)
(+) Zoomable Image
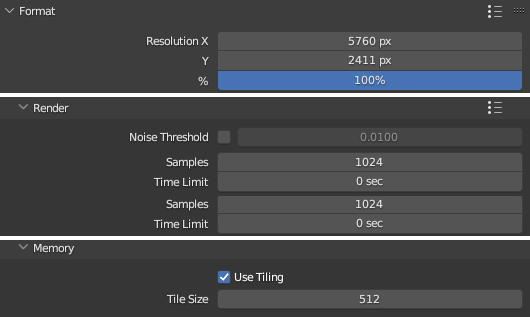
6.7 Render Settings
Find the balance between quality and render times
The 5760 x 2411 Resolution size is huge, but the 1024 Samples are lower than my previous projects. The 512 Tile Size was necessary to remove many problems trying to render a bigger size. Also, I have used the new Path Guiding.
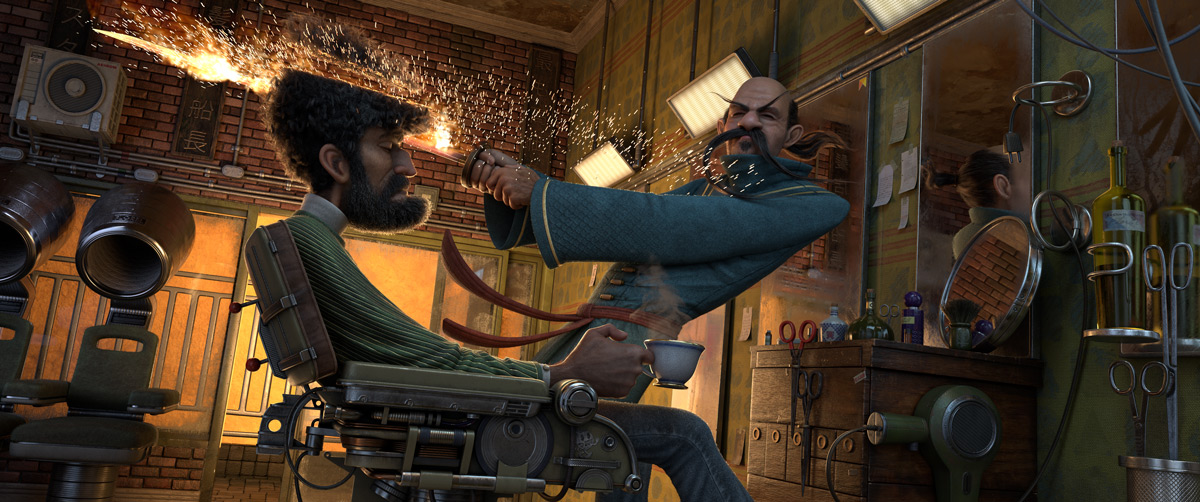
6.8 Post-Production
Get the max of your Render or even more of what you expected
Im going to use Adobe Photoshop and the Addon Exr-IO that we discussed before to open the EXR file.
1. Change the image from 32-bit to 16-bit.
2. Then go to Camera RAW with “Control + Shift + A” to add some Texture, Clarity and Sharpness to the image.
3. With all the Render Passes & Light Groups, Make a composition that pleases your eye.
3.1 I use mainly the Screen Mode for the Light Groups and test multiple modes like Multiply, Overlay and some more for the Render Passes.
3.2 Use the Mist Pass as an Alpha to add some depth.
4. Select a LUT to get a cinematic appearance.

Compare Image
The Project


7.1 Conclusion
In this project, I tried many new things that I learned at working on Feature Films at Framestore London, and I am very grateful to those people who helped me grow as an artist, from general theory to specific techniques.
I always received support from the substance team, and the fact that they didn’t rush me to finish gave me the time to learn many things along the way.
I am also very grateful to the people who follow my work for their patience and support.
Alex Treviño
Acknowledgements
Marine Kim For contacting me to do the project and support.
Stefan Mayr Gave me more knowledge about Blender than anyone else in my history as a digital artist.
Owen Jackson For helping me develop a critical eye and explaining how render passes work in post-production.
Juan Gea The person who made it possible for Light Groups to be present in Blender and from whom I have learned a lot about Geometry Nodes.
Julio Benavides For always giving me great technical advice in the worst possible way.
David Zavala For the emotional support and his advice on human anatomy and character textures.
Mr Kone For allowing me to use his great art and for this to be just the beginning of a future collaboration.
Nina Lagler For always supporting me in every project and believing in me when even I do not.
In Memory of Florinda Elva (FlorEl) Thanks to my mother, whom I miss every day, who helped me and motivated me to keep fighting for my dreams until her last day.