Software
Blender 2.79b
Substance Painter 2018.3
Photoshop CC
Substance Painter 2018.3
Photoshop CC
Featured
- blenderartist.org
- cgsociety.com
- blendernews.org
- 3Dtotal
- Blender 2.81 Splash Screen
- Concept
- Folder Structure
- Blender Add-Ons
- Blockout
- Cloth Simulation
- Rigid Bodies
- Sculpting
- Bones
- Retopology
- Hair Particle System
- UV Maps
- ID Maps
- Export to Substance
- Import from Blender
- Baking per Mesh
- Material Selection
- Anchor Points
- Export Maps to Blender
Download the free clay render or support me to continue doing more projects like this, and download the scene ready to paint or the scene I painted!
Now that this is the official Blender 2.81 Splash Screen you can also download the new version for free, this will work with Cycles and Eevee!
Modeling
Blender 2.79b
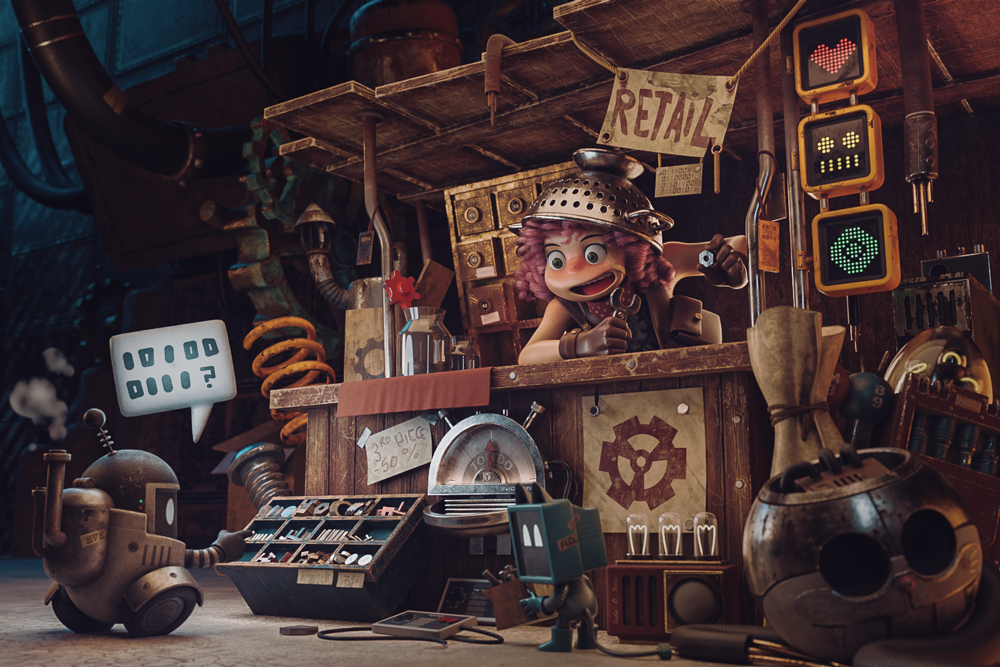
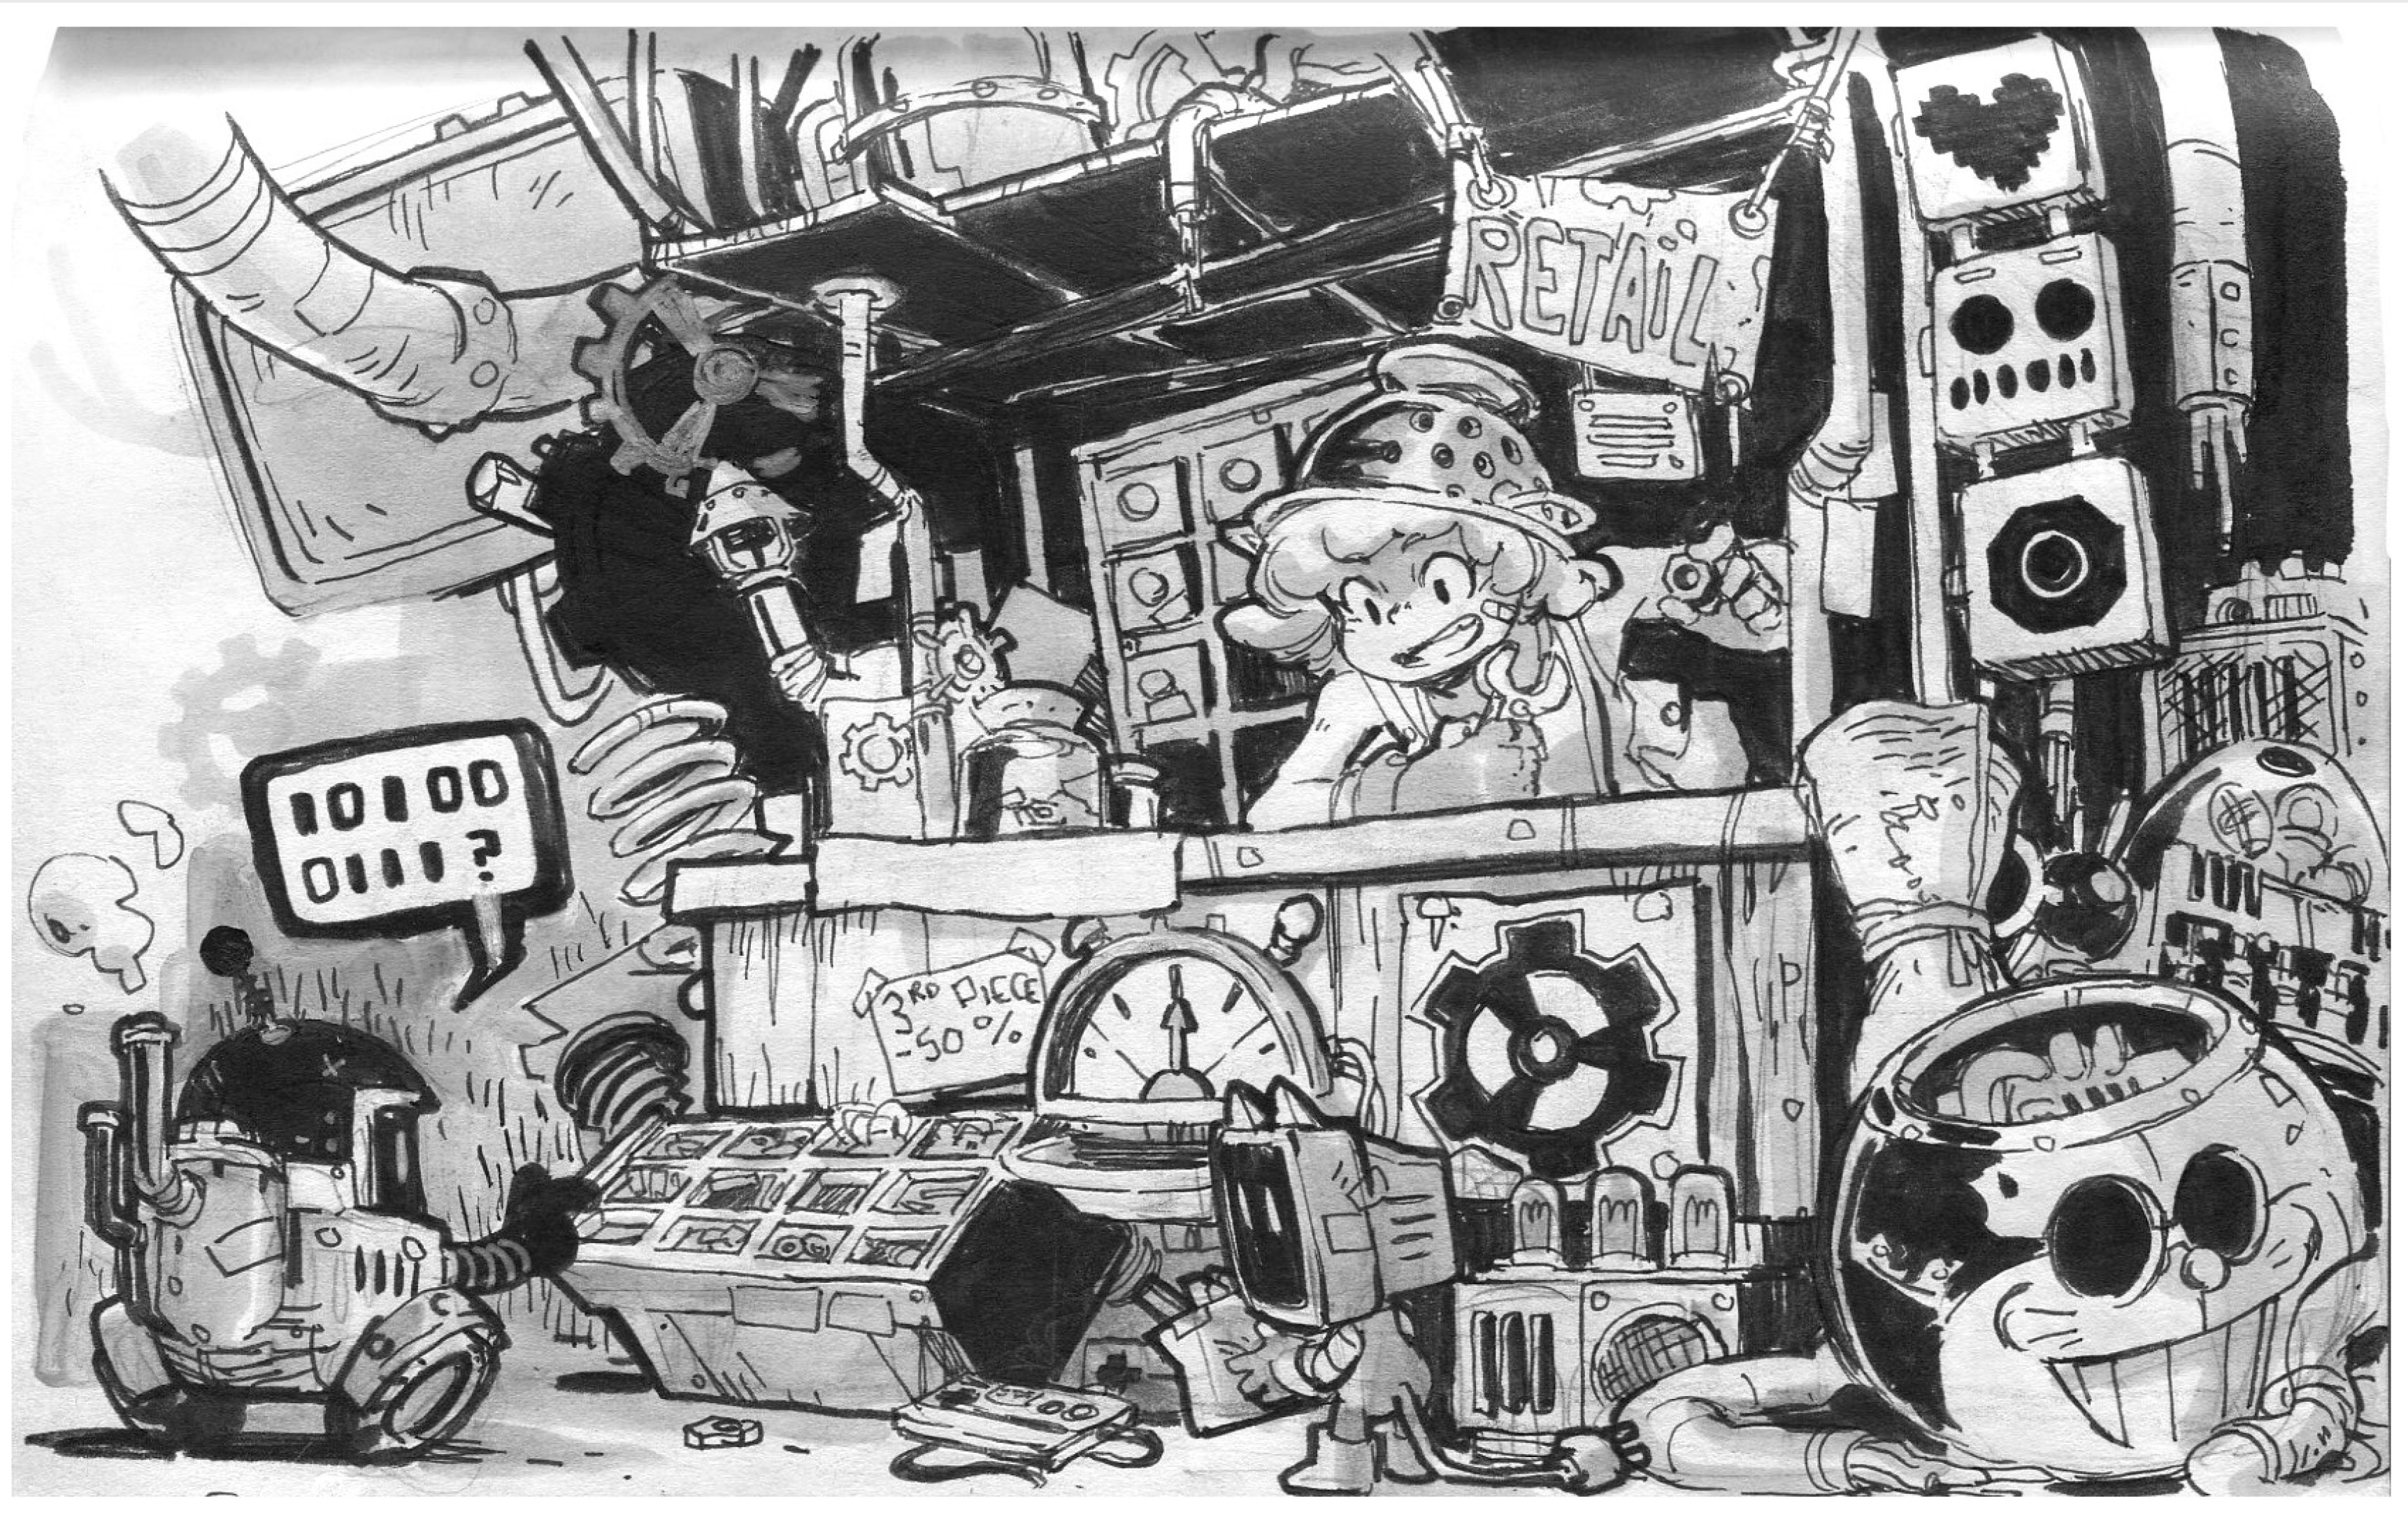
1.1 Concept
This project is based on one of the concepts of Anaïs Maamar. This is the second project of the series and I seek to learn new things, which we will be focusing on. The topics learned in this project were retopology, rigid objects, cloth simulation as well as the handling of hair particles. What I had explained before in the last workflow I will omit.
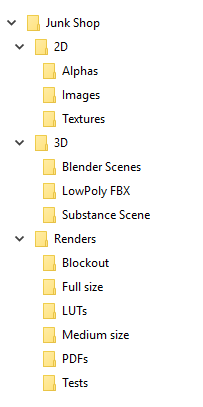
1.2 Folder Structure
The order of the folders is very similar to the last project. I start by dividing the files into 3 main folders. The 2D folder that has the alphas and final textures. The 3D folder has the Blender scene, low poly files and the substance painter project. Finally, the Rendering folder contains the process, the selected LUTs and the final images.
1.3 Blender Add-Ons
I use two add-ons that speed up the development of a 3D project. The addon F2 (1.3.1) for Retopology, and the Node Wrangler (1.3.2) to handle nodes much more quickly.
1.3.1
1.3.2
1.3.2
1.4 Blockout
First I focus on the general forms of the scene. Increasing complexity in each pass, the last step was to detail the characters. You have to remember to increase the detail gradually.
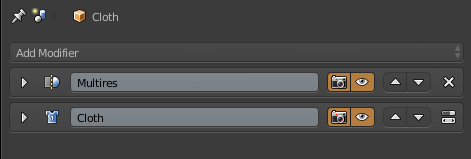
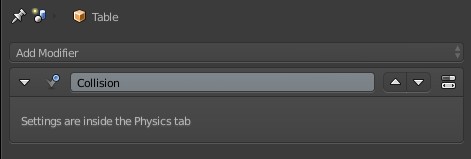
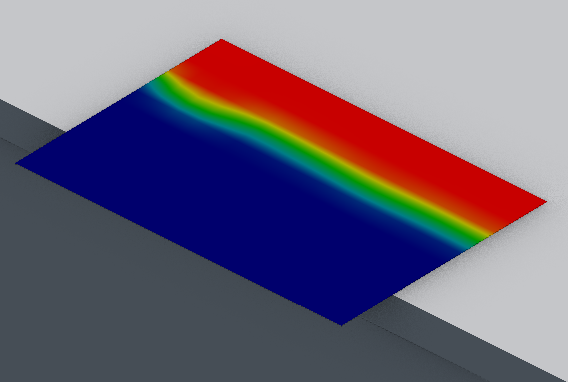
1.5 Cloth Simulation
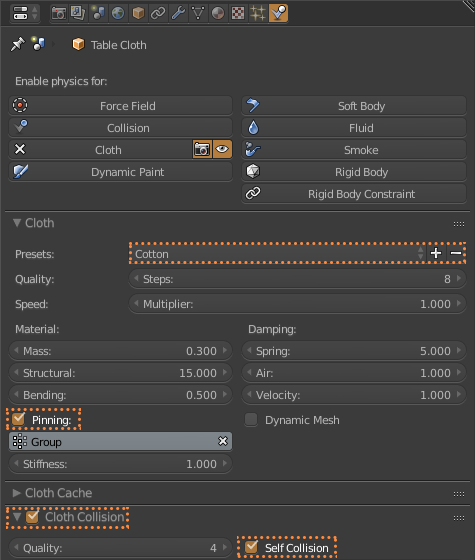
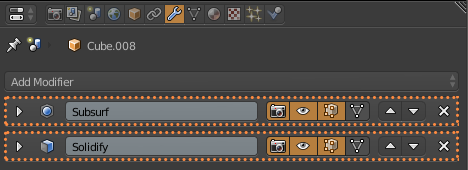
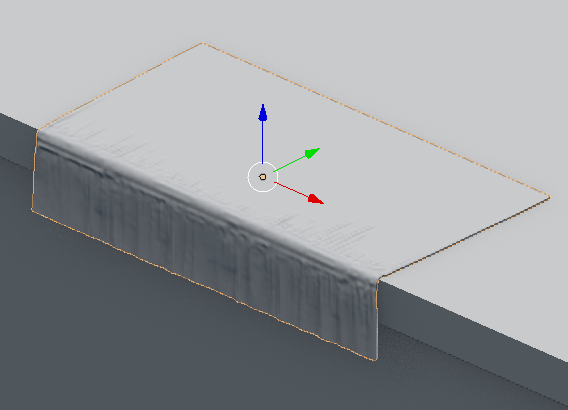
First I select the cloth and add two modifiers, Multiresolution and Cloth (1.5.1). Then I select the Table and add the Collision modifier (1.5.2). I switch back to the cloth and select Weight Paint and paint in red what I do not want to move in the simulation (1.5.3). In the physics of the cloth, I use the Cotton preset and use what I paint in Weight Paint in Pinning, also selecting Cloth Collision and Self Collision (1.5.4). To start the simulation I click on play in the timeline (1.5.5). Once I like the result of the cloth, I apply the modifiers of the Multiresolution and Cloth (1.5.6). And finally add the modifiers Subdivition Surface and Solidify (1.5.7). The cloth is now ready (1.5.8)
1.5.1
1.5.2
1.5.3
1.5.4

1.5.5

1.5.6
1.5.7
1.5.8
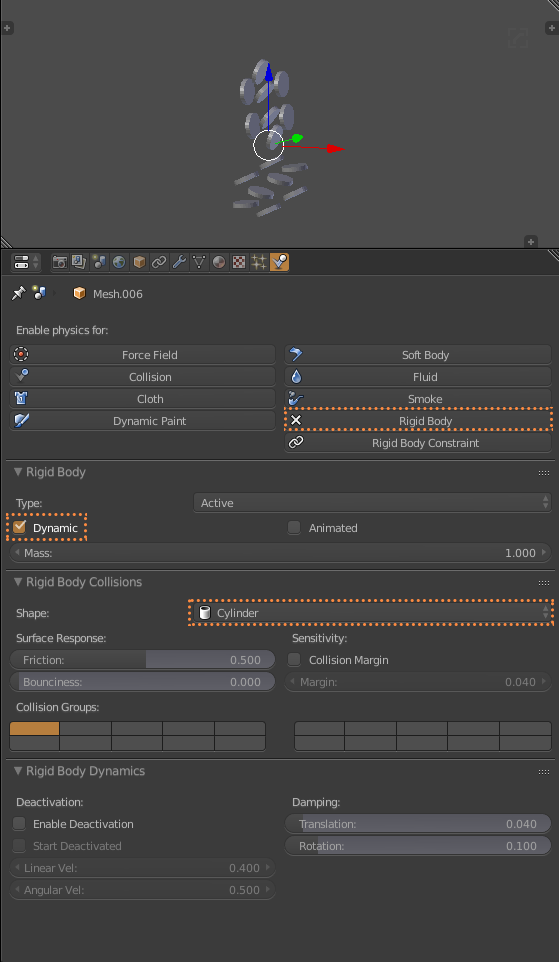
1.6 Rigid Bodies
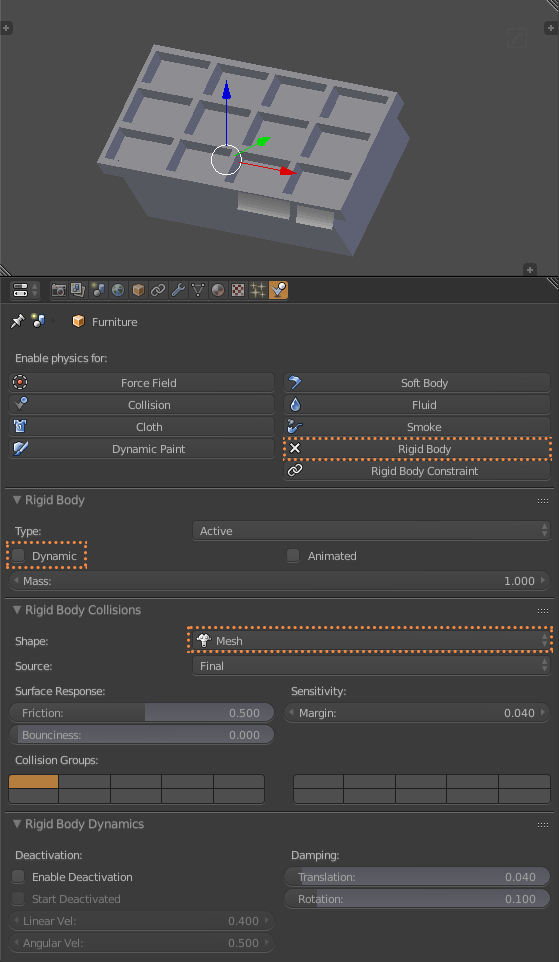
The piece of furniture where the objects will fall, I put Rigid Body’s physics on it. I remove the Dynamics brand so it does not move, and I use Mesh for the collisions (1.7.1). In this case I have some coins that I also add Rigid Body physics. But you leave Dynamic selected. And since these are coins I put the collision of a Cylinder (1.7.2). Click Play on the Timeline (1.7.3) and see how the objects fall inside the piece of furniture (1.7.4). Then I select the coins and I duplicated them Shitf + D, I join them Control + J and put their center in the geometry with Shift + Control + Alt + C. Finally I remove the Rigid Body.
1.7.1
1.7.2
1.7.3
1.7.4
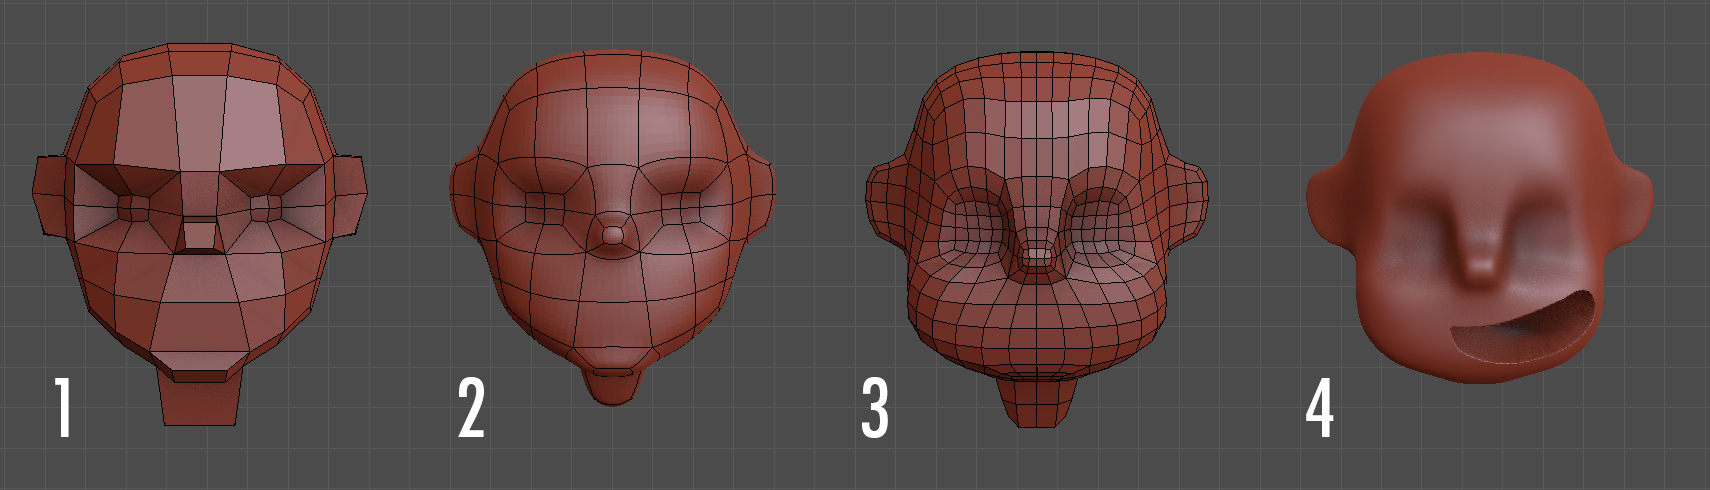
1.7 Sculpting
For the head I made a Base Mesh (1), then I added a Subdivition Surface modifier (2), then moved vertices in Sculpt Mode until there was something I liked and having the desired shape, apply the Subdivision Surface Modifier (3) and added a Multiresolution modifier, at the end I applied a Boolean for the mouth and retopologize just to the mouth. (4)
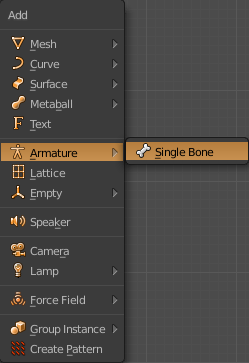
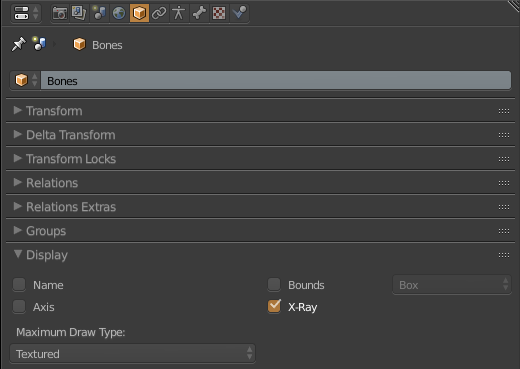
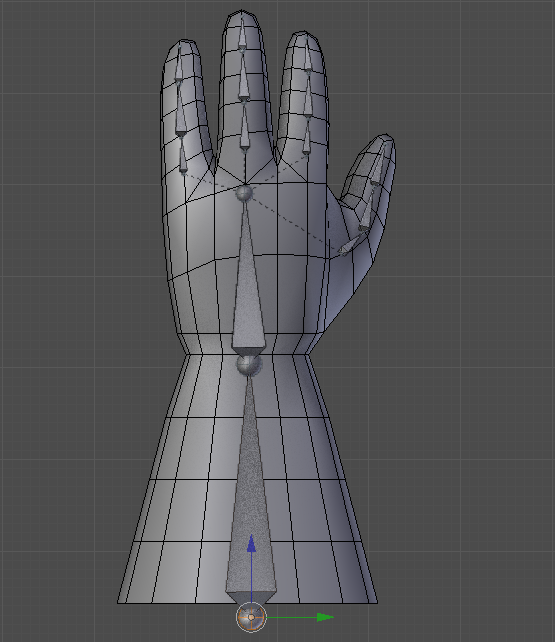
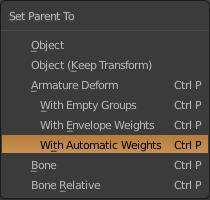
1.8 Bones
For the hands start by putting a bone with Shift + A in Armature> Single Bone (1.8.1). Put the option X-Ray to see the bones in a mesh (1.8.2). To move the bones go to Edit Mode. You can extrude a bone from one end of another with E, or create a new bone with Shift + A, and duplicate with Shift + D. It is necessary to put the bones of the fingers as a child of the bones of the hand Control + P with the Keep Offset option (1.8.3). Finally select the Mesh of the hand and make it the Child of the bones with Control + P. Select With Automatic Weights (1.8.4). To move the hand it is necessary to move it through the bones. Select the bones and enter Pose Mode to move, rotate or scale the hand (1.8.5)
1.8.1
1.8.2
1.8.3
1.8.4
1.8.5
1.9 Retopology
To begin with retopology you first have to click on Snap, choose Faces and Project Individuals Elements (1.9.1). With that add a Plane with Shift + A, and I will extrude it with E (1.9.2). With the Add-On F2 you can select a vertex and click on F to create a face (1.9.3). The general workflow (1.9.4) to make the cat’s head first create a Base Mesh (1), give it a Subdivision Surface and apply it (2). Separate the head in parts (3). Make a basic retopology (4). Add detail to separate each area (5), finally add more details and put again a Subdivision Surface (6).
1.9.1
1.9.2
1.9.3
1.9.4
2.0 Hair Particle System
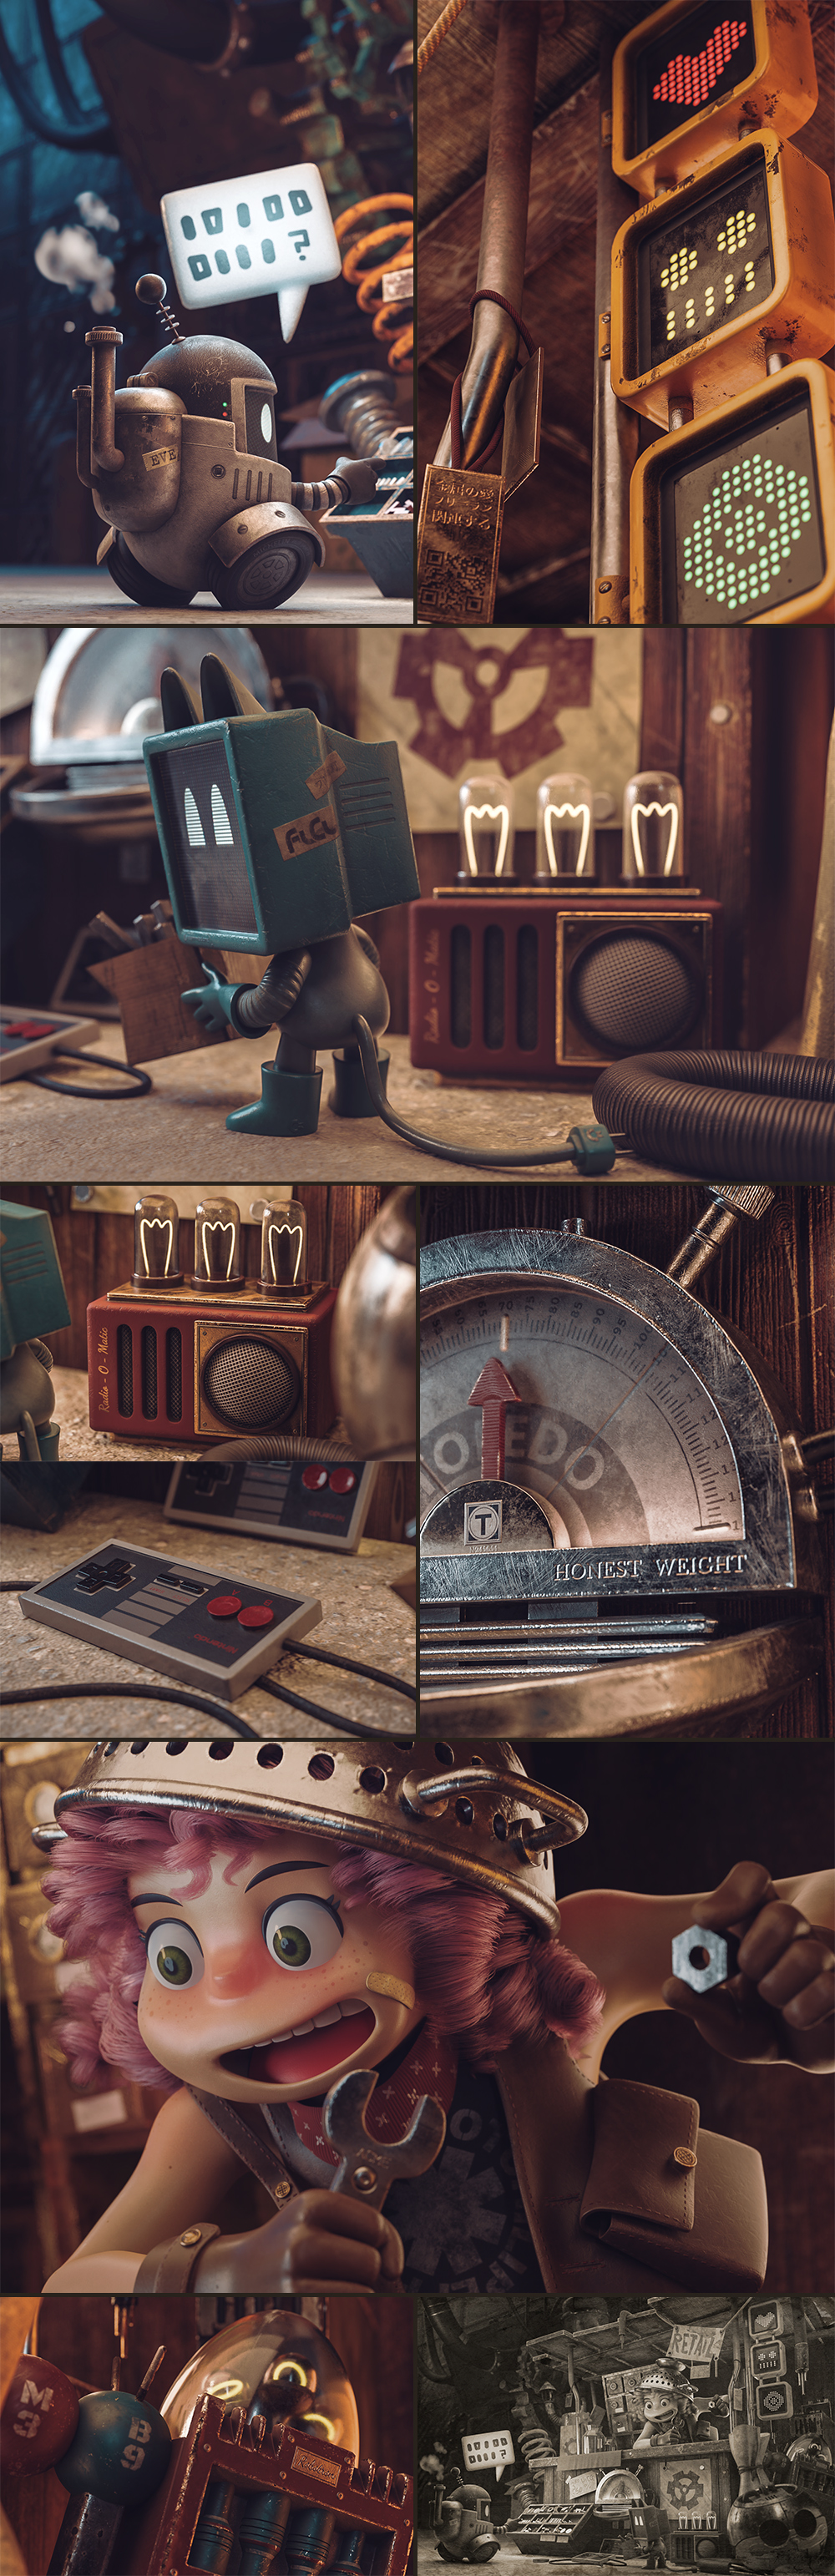
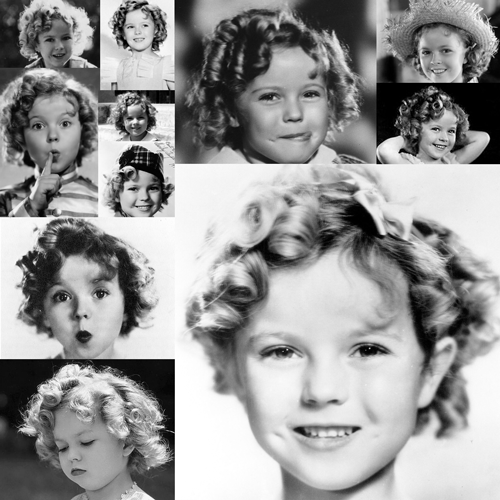
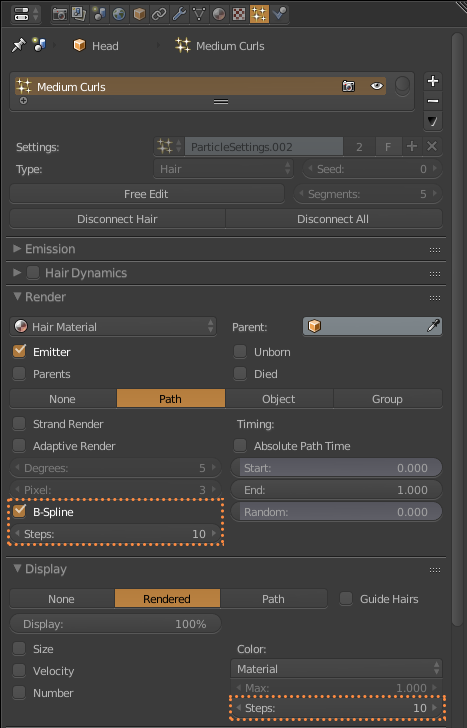
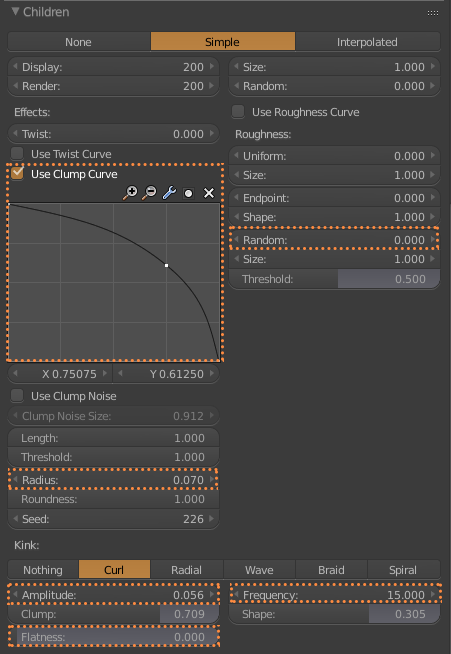
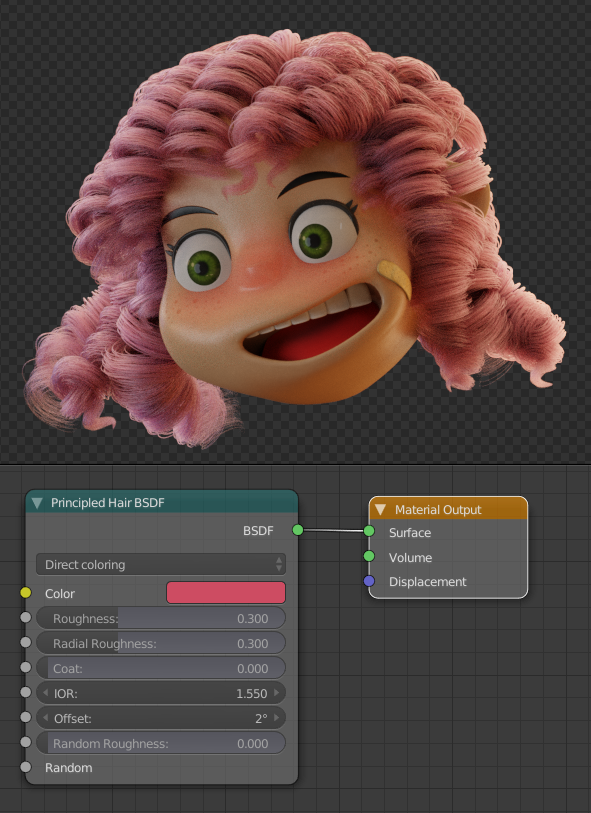
The girl’s hair is based on the hair of the actress Shirley Temple when she was young (2.0.1). First I selected the head of the girl to be the base for the hair. Add a Hair Particle System, selecting the length in Length and leaving the number of particles at zero. Check Render> B-Spline and put 10 Steps to make the hair look smooth (2.0.2). I equal the number in Display> Steps. In Children I put it in Simple, and play with the values of Clump Curve, Radius and Random, finally in Kink select Curl to generate Curly hair, using Amplitude, Flatness and Frequency (2.0.3). I switched to Particle Edit and selected Particle Select Point (2.0.4). In tools, I select Add and start adding strands of hair. And I use also Comb (2.0.5). Finally, the material of the hair is the new Principled Hair BSDF (2.0.6) that for the moment only works in experimental versions like the Blender 2.79.5
2.0.1
2.0.2
2.0.3
2.0.4
2.0.5
2.0.6
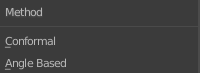
2.1 UV Maps
When Unwrapping I use the different methods. Normally for tubes, Angle Based works better. And for things like boxes Conformal.
2.2 ID Maps
It is important to have ID Maps to select areas in Substance Painter easily. Using the L key facilitates the selection of faces divided by islands in the UV Map. Remember to select in Edit Mode, paint in Vertex Paint Mode and apply the color with Shift + K.
2.3 Export to Substance
To export to Substance Painter I save the scene in Low Poly, and the main objects like the girl and the robots in Highpoly to bake them separately, all this in FBX. It is very important to have only One material for each UV Map.
Texturing
Substance Painter 2018.3
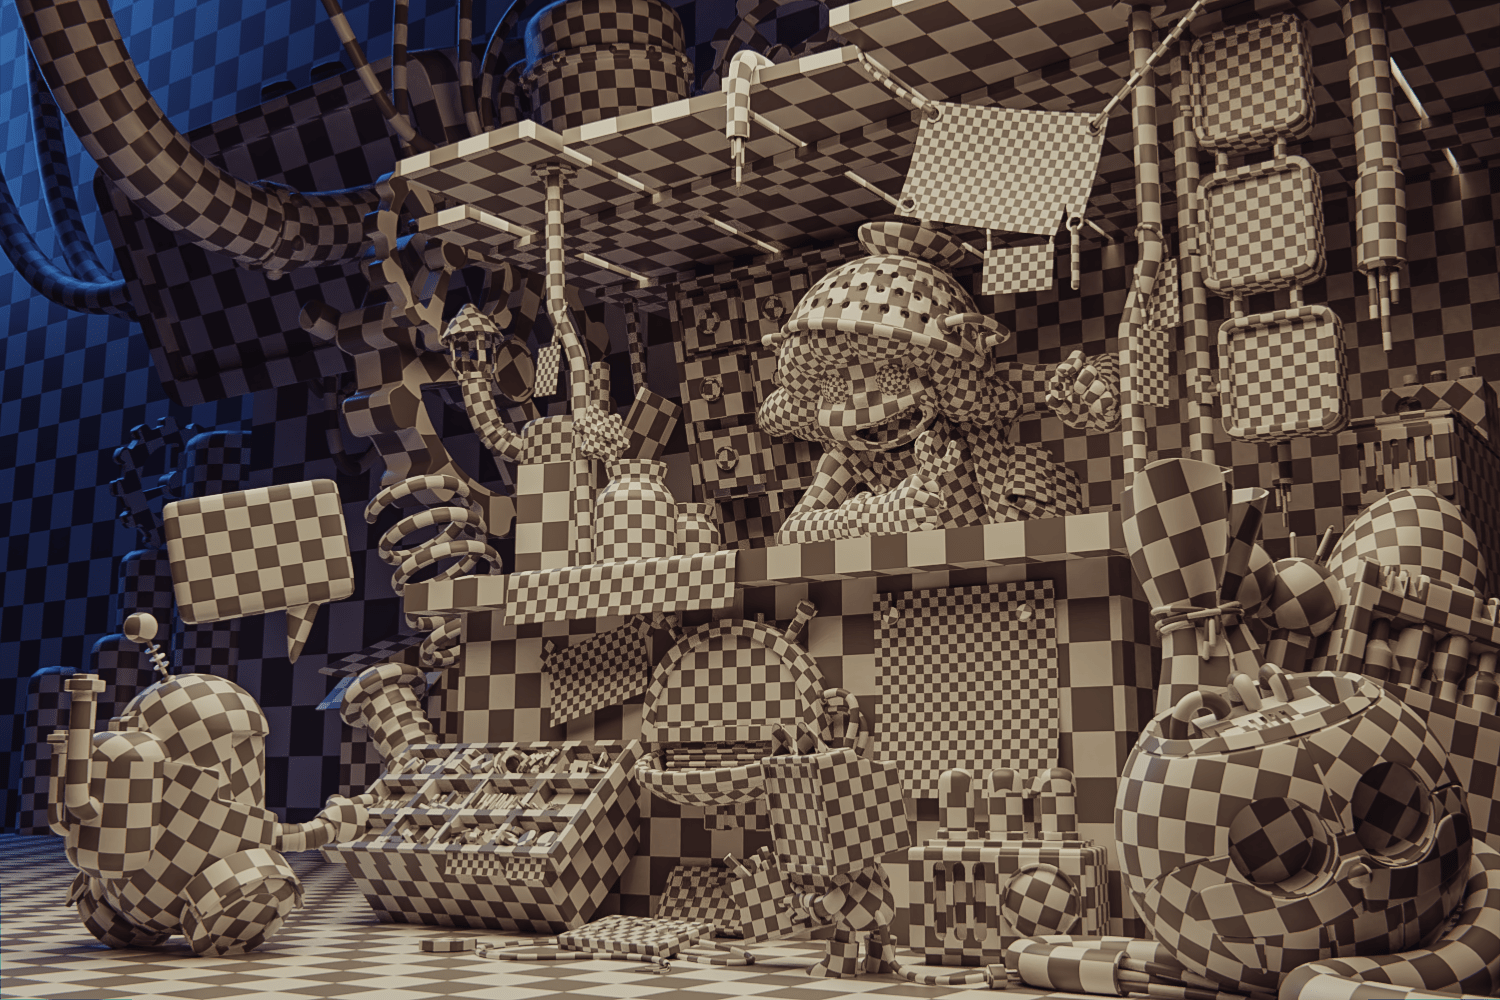
2.4 Import from Blender
I use the Template PBR – Metallic Roughness (Allegorithmic), and for the Mesh I select the complete Low poly scene that I previously saved in FBX. It is very important to select OpenGL in the Normal Map Format so that the Normal map works correctly in Blender Cycles. For the resolution of the maps I start with 512 at the beginning. And then raise the quality of the meshes one by one to 4K.
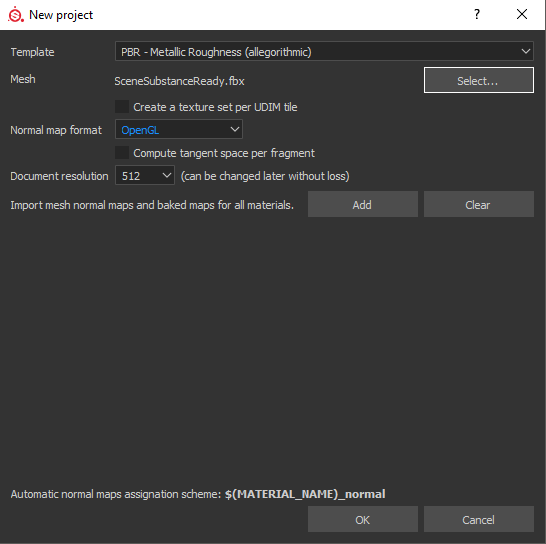
2.5 Baking per Object
This time the scene was so big that I could not bake the whole scene in one take because it took hours, so as I was moving forward I was doing the bakes one by one. It is very important that the Output Size is as large as possible, in my case I used 4K, although it is possible to make up to 8K.
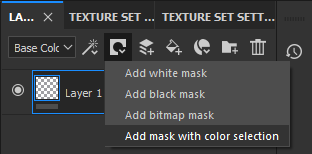
2.6 Material Selection
To select by ID Map, you need to use Add Mask With Color Selection to later select the area you want to paint.
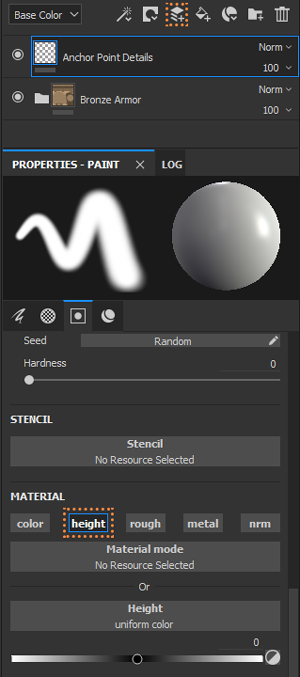
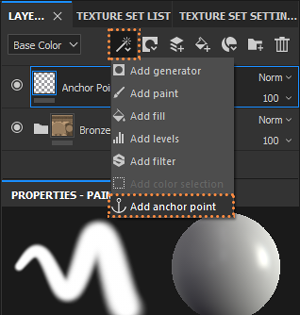
2.7 Anchor Points
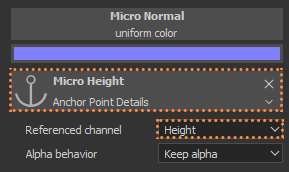
Details like Bump are never affected by generators, but with Anchor Points this is now possible (2.7.1). For these to work, you have to use a Standard Layer, use only Heigth (2.7.2) and add an Anchor Point (2.7.3) it takes the same name from the layer. The generator that will take these details has to be higher on the layer system, than the detail layer. For the generator to use the details you choose Micro Height, then in Anchor Points select the name of the details and in Reference Channel use Height (2.7.4), finally click on Micro Details> Micro Height> ON (2.7.5)
2.7.1
2.7.2
2.7.3
2.7.4

2.7.5
2.8 Export Maps to Blender
To export the textures, go to File> Export Textures or press Control + Shift + E (2.9.1). In some cases I added maps such as Emissive, Ambient Occlusion and Thickness.
RENDERING
Blender 2.79.5 & Photoshop CC
2.9 Principled BSDF
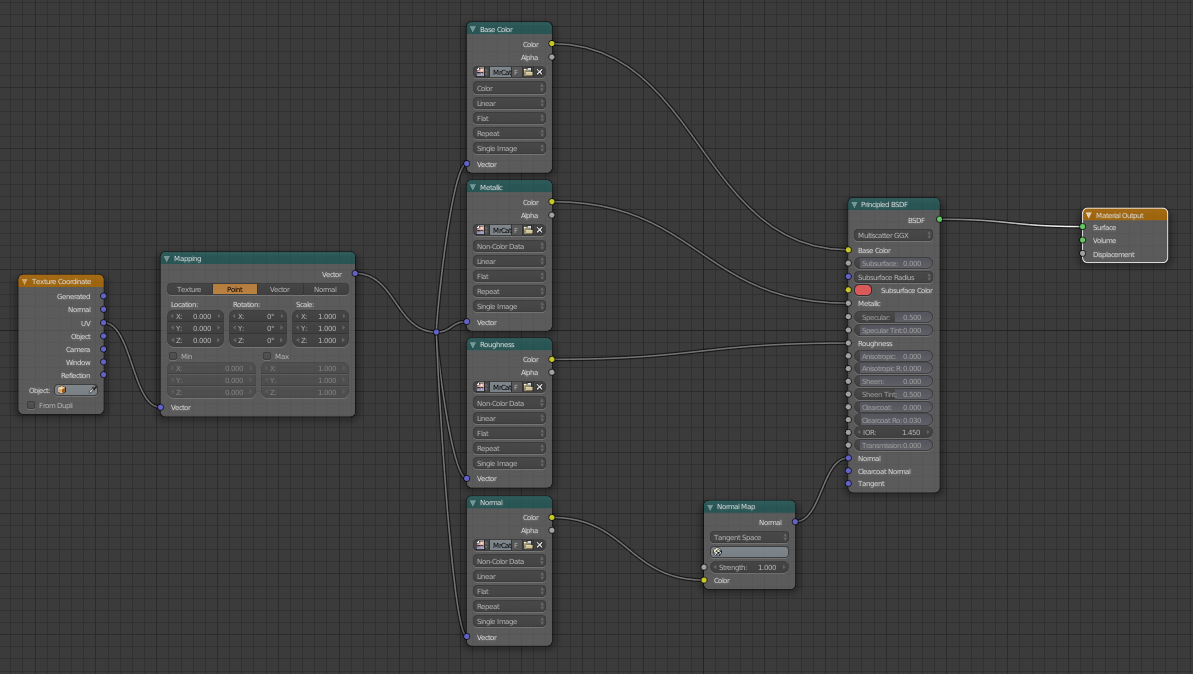
Control + Shift + T is the essential shortcut to load the basic maps and connect them automatically. Select the Base Color, Metalness, Roughness and Normal Map. The Emissives and the SSS must be added separately.
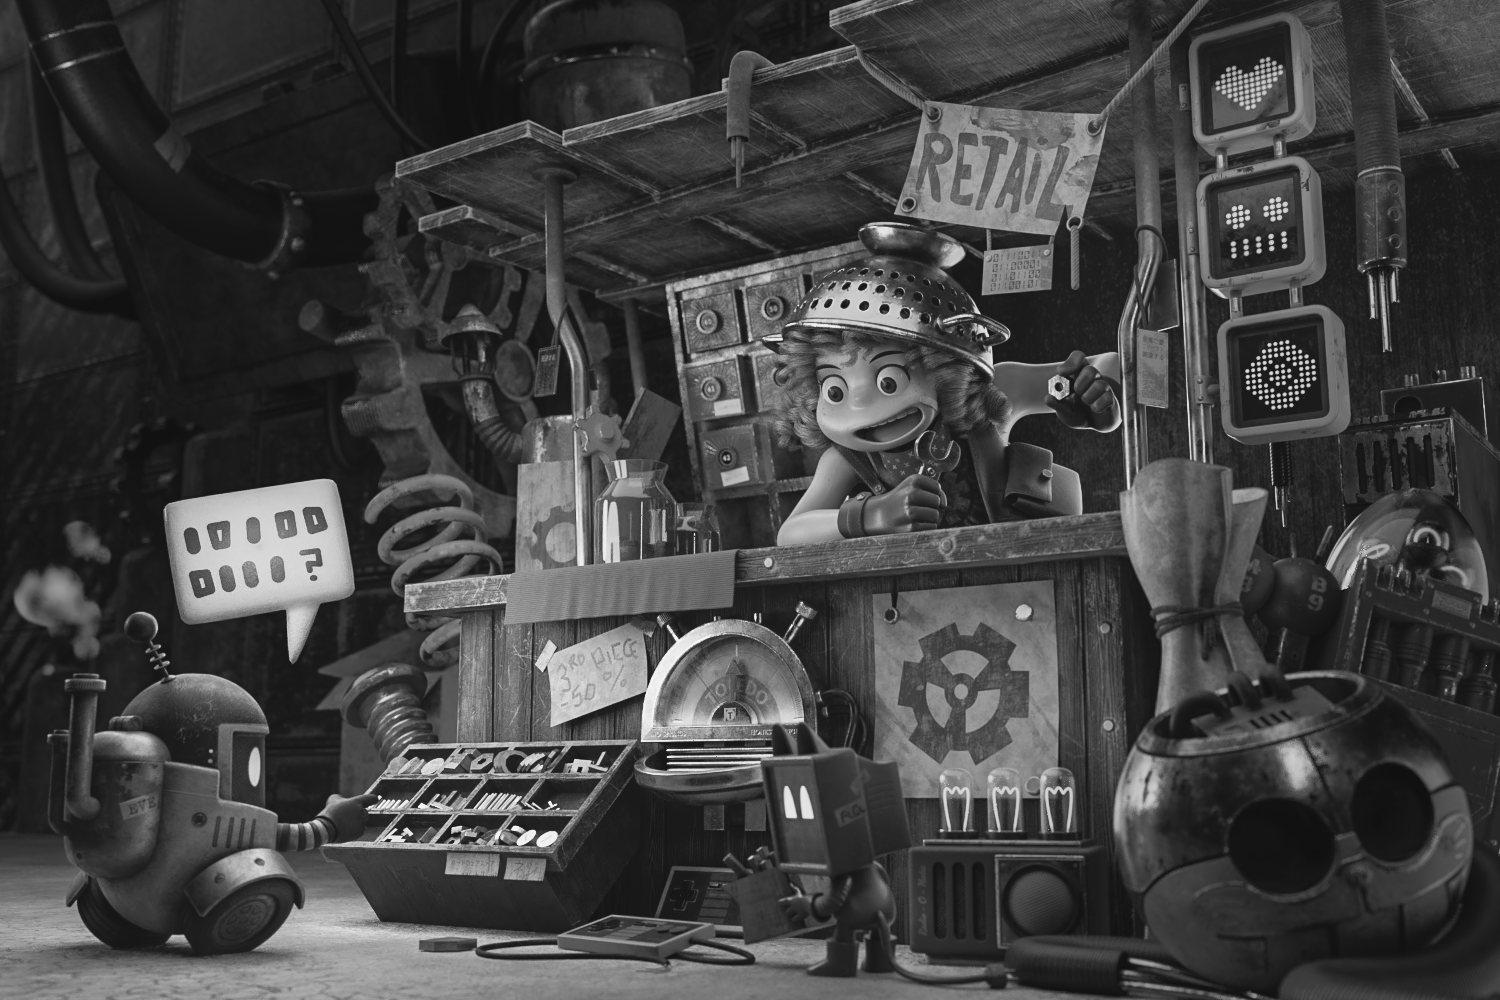
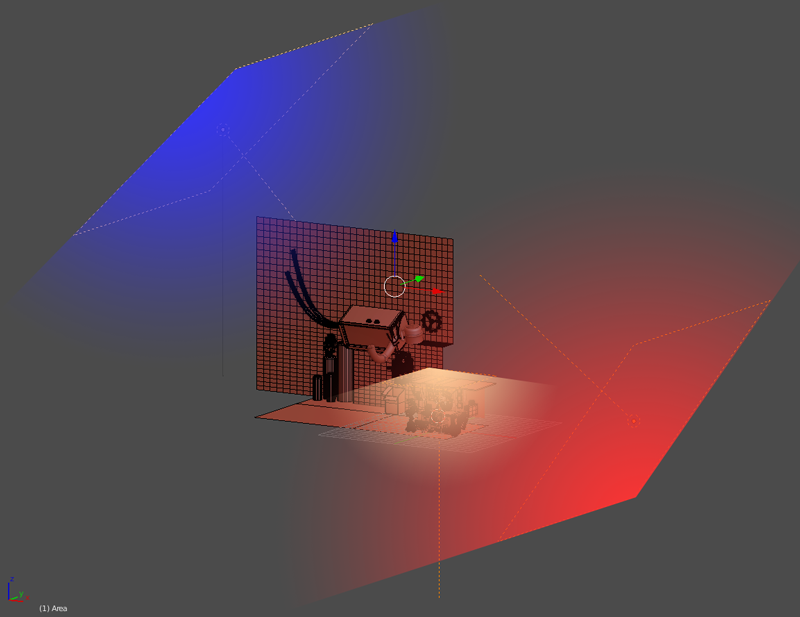
3.0 Ilumination
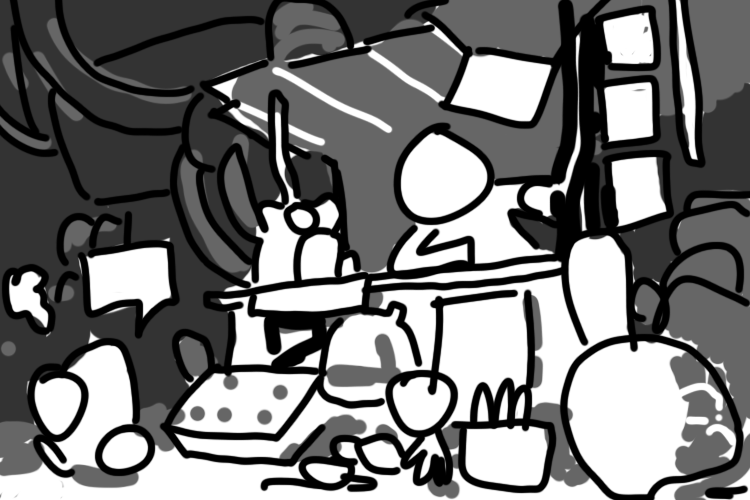
To focus on the front of the composition I used light values on the front, and darker ones on the background. Usually, I do a value study with 3 tones (3.0.1). Also use temperature to illuminate, here are 3 main lights, a blue area light in the background with cold temperature and an with a intensity of 6000, one area light in front with a very warm temperature and an intensity of 4500, and one area light above the characters with a subtle warm and with an intensity of 1000 (3.0.2). I also put some support lights that vary in intensity between 2 to 20, this help generate extra light and reflections.
3.0.1
3.0.2
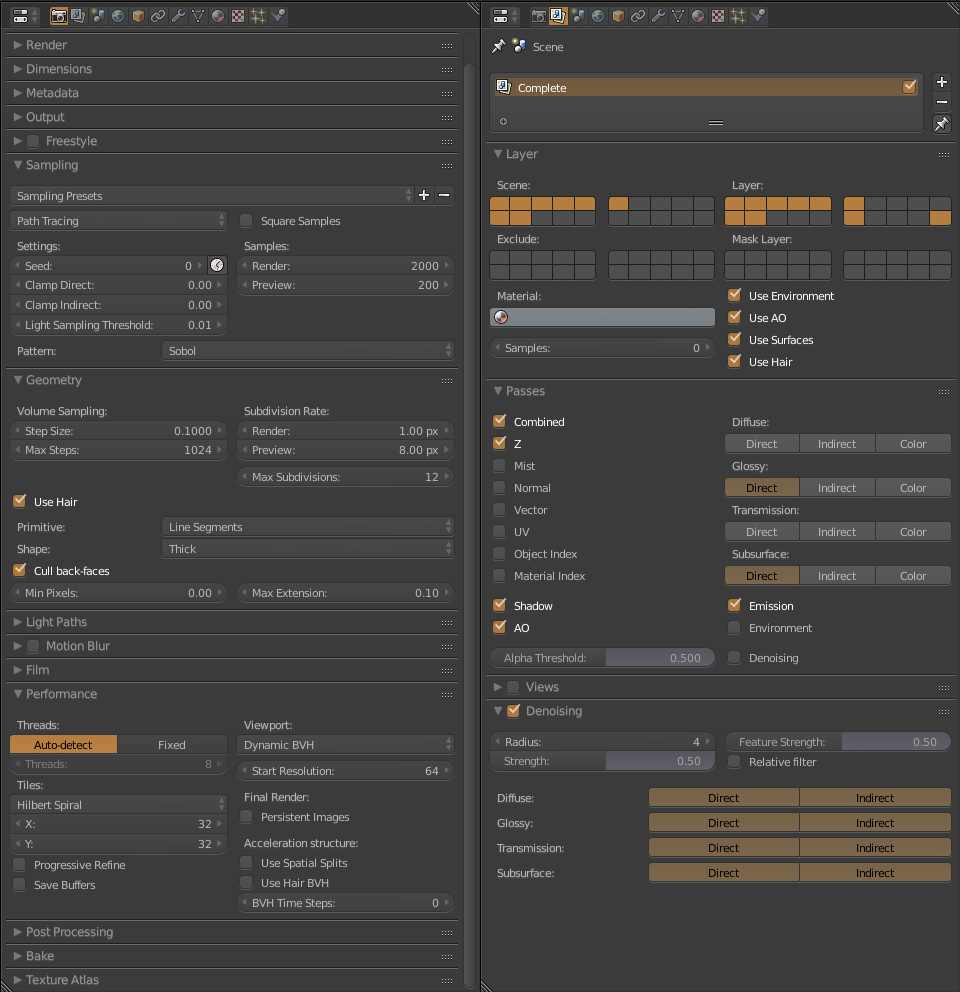
3.1 Global Settings
I used 2000 Samples, a Bounce on Max and Min of 4. I used Filmic on Color Management to give a clear color. You also have to take advantage of the Passes as Shadow, AO, Emission to use them in post-production. As I use an experimental version of Blender 2.79.5 and the render will be CPU + GPU I have Tiles of 32 x 32.
3.2 Render Farm
To render large images, I used the Renderfarm Blendergrid. They have good prices and good render times. The 3000 X 2000 render cost 5 dollars. It took 2 hours. And the 7500 X 5000 cost 30 dollars and it took 10 hours. The service is personalized and very fast. I needed to use an experimental version of blender for this project (Blender 2.79.5), I asked if I could render with them with that version, in a week they had it working. The only thing I can say about Blendergrid is that I will use it again. Click on the logo to go to their site.

3.3 Post-production
In Photoshop I use Control + Shift + A for the Camera Raw Editor and improve the Exposure, Highlights, Clarity, Noise Reduction and other effects (3.3.1). I also make an emphasis on the robot and the girl with a white line using Screen and an inverse with overlay. (3.3.2)
3.3.1
3.3.2
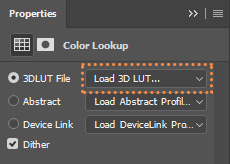
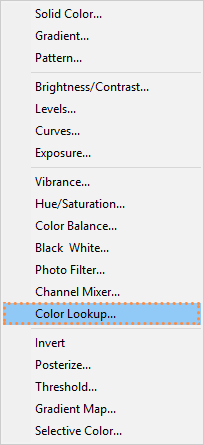
3.4 LUTs
The Look Up Tables (LUT) are color graduation presets. To use them go to Create New Or Adjustment Layer (3.4.1), select Color Lookup (3.4.2), now select one of the presets (3.4.3). I usually try different LUTs before deciding the final one (3.4.4).
3.4.3
3.4.1
3.4.2
3.4.4
Conclusion
This project is the second workflow of the Blender + Substance Painter series. I have really enjoyed doing the project and learning new skills was a great challenge. In this project my approach was to use physics for the simulation of cloth and rigid objects in a basic way. As well as learning to do the retopology. This project was much more complex and slow than the last project and I am now thinking about whether to do something smaller and more complex or to do something even bigger. What do you think? Leave comments in my Facebook page or in my Instagram account
Alex Treviño